Step-by-step guide for making a very simple temperature and humidity meter with 7-segment LED displays
|
|
In this blog post, I am providing you step by step instructions to build a very simple temperature and relative humidity meter for indoor use. All you need to build this project are an Arduino Uno or compatible board, a DHT11 sensor, and a MAX7219 based 8-digit serial 7-segment LED display. The temperature is displayed in degree Celsius and relative humidity in percentage.
Temperature and Humidity meter
Things required to build this project
Arduino Uno board
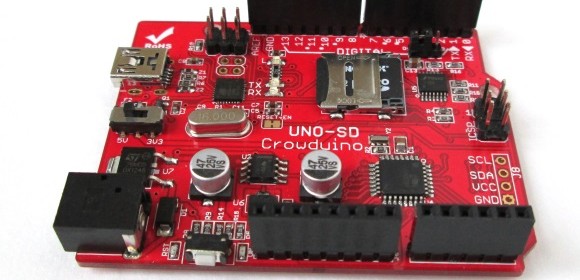
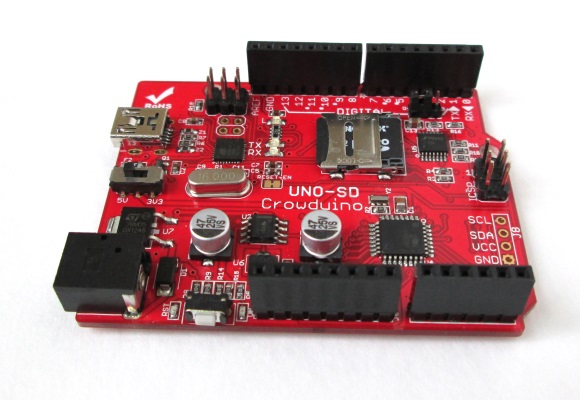
I am using Crowduino Uno SD board, which is manufactured by Elecrow and is fully compatible with Arduino Uno board. Crowduino has the following additional features that the standard Arduino Uno board doesn’t have.
1 Reset button is placed on the left side edge, and thus more convenient to access.
2 Improved power supply circuit with selectable 3.3V and 5.0V for operation.
3 Uses the mini USB connector to avoid the potential risk of connecting to the shield plugged in.
4 Micro SD card slot on board, which makes this board useful for data logging applications.
Crowduino Uno SD board
DHT11 sensor
DHT11 is an ultra low cost digital sensor for measuring temperature and relative humidity. It operates from 3.0-5.0V and provides calibrated digital outputs for temperature (in degree Celsius) and humidity through a single wire serial interface. It can measure humidity ranging from 20-80% with 5% accuracy, and temperature ranging from 0-50 degree Celsius with 2% accuracy. When it is active, the maximum current consumption is 2.5mA. The sensor has 4 pins with 0.1” spacing as shown below.
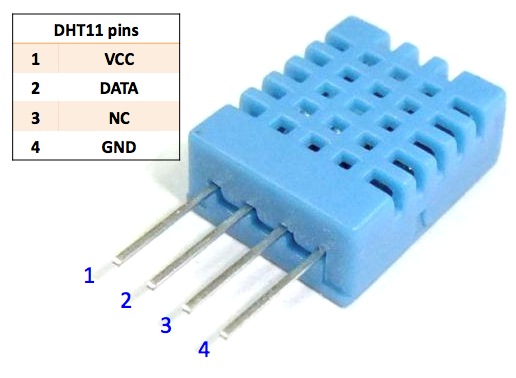
DHT11 sensor and its pins
MAX7219-based seven segment display
The next thing required to do this project is two rows of 4-digit seven segment LED displays for displaying temperature and humidity simultaneously. This project uses SPI7SEGDISP8.56-2R display module, which is MAX7219 driven and allows you to control all 8 digits through a 3-wire serial interface. The display brightness can also be adjusted through software commands. In addition, library routines are available for interfacing the SPI7SEGDISP8.56-2R module to Arduino. This project, in particular, uses the LedControl library.

SPI7SEGDISP8.56-2R display module
Jumper cables
We will also need a few male-to-female type jumper wires to connect the parts together.
Power supply
You can use an USB cable connected to PC or a 9V DC wall adapter to power this project.
Project setup
In this project, we insert the DHT11 sensor directly into the right female headers of the Arduino Uno board such that the pin 4 (GND) of DHT11 goes in to the GND pin (second pin from top right) of the Arduino header. With this arrangement, the pins 1 (VCC), 2 (Data), and 3 (NC) of DHT11 will be connected to Arduino digital I/O pins 11, 12, and 13, respectively. Since DHT11 requires only 2.5mA current at most during operation, it will be powered directly through Arduino pin 11 by setting it to 1. The Arduino pin 12 is used to read the sensor output.
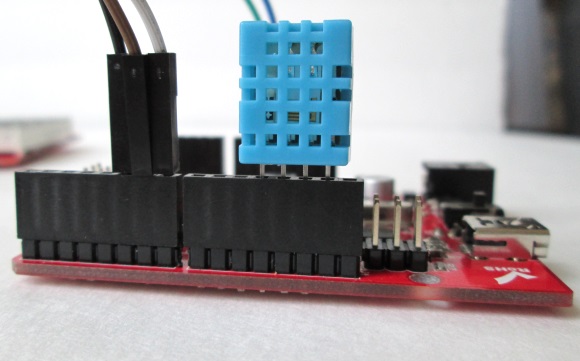
Inserting DHT11 directly into Arduino headers
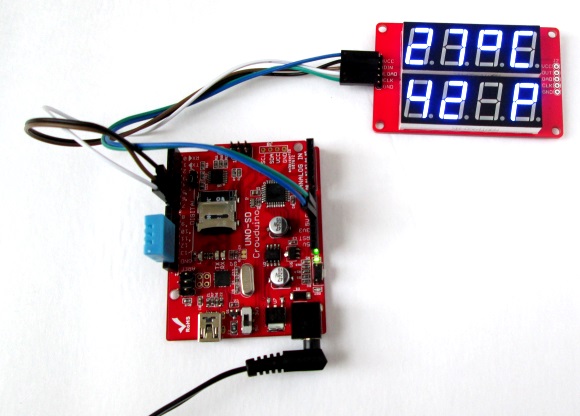
Next we connect the SPI7SEGDISP8.56-2R display module to the Arduino board. The display is powered by 5V and Gnd supply pins from left header pins on the Arduino board. The DIN, LOAD, and CLK pins of the display are wired to the Arduino digital pins 5, 6, and 7, respectively. The complete setup looks like the following picture.
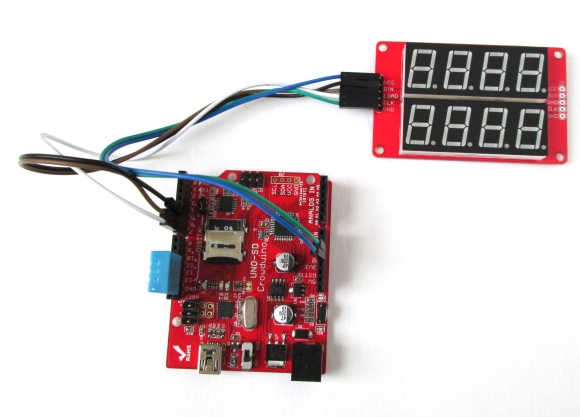
Complete setup of the project
Arduino Software
The firmware for this project uses the LedControl library for MAX7219 interface and Adafruit’s DHT sensor library for reading the DHT11 output. I have slightly modified the LedControl library to display the degree symbol and the capital letter ‘C’. You can print the degree symbol using the following setChar command using the modified library.
setChar(0, 1, ‘/’, false)
The sensor measurements are taken every second and updated on the display.
Download the modified LedControl library from here.
Download the DHT Sensor library from here.
Download the Arduino sketch for this project from here.
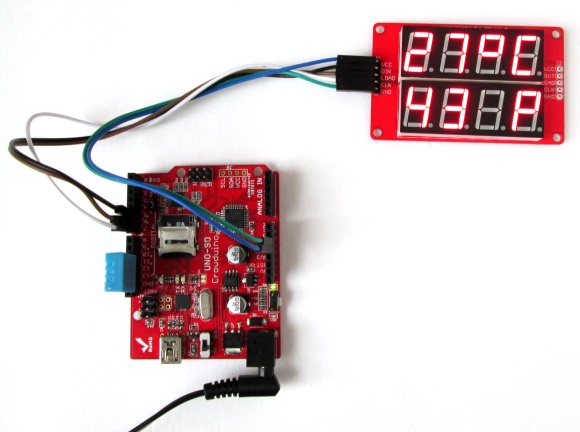
Displaying temperature and humidity on seven segment LED displays
Where to buy components
If you are interested to build this temperature and humidity meter, you can buy all the components from Elecrow, China. They ship items worldwide at a reasonable shipping cost. Here are the links for the products.
SPI7SEGDISP8.56-2R display (it comes in three colors)
USA buyers can also buy the SPI7SEGDISP8.56-2R displays directly from our Tindie Store. Use the following links:
SPI7SEGDISP8.56 buying link – Red color
SPI7SEGDISP8.56 buying link – Yellow color
SPI7SEGDISP8.56 buying link – Blue color
|
|
I didn’t save it and lost it so i am starting over, sorry maybe i’ll find the error then if not i’ll post code here
i am tring to but 2 7 segment with 8 displays to gether and having no luck with getting the second unit to work.
i have change my code many diff was and nothing
thanks harry
please sir i need the complete code that will control all the component its confusing above.i need to copy directly to aduino. and test
Hi.
I have tried the above and get readings way off in rh and temp a little
I added +20 to rh in the sketch and -1 for temp
how can I modify this sketch to read an average from the sensor input and not display a slewing readings of +/-3-4 deg and rh?
Pingback: BLOG | Build an indoor temperature and relative humidity meter using Crowduino Uno and DHT11 sensor