MAX7219-based double row 4-digit seven segment LED display
|
|
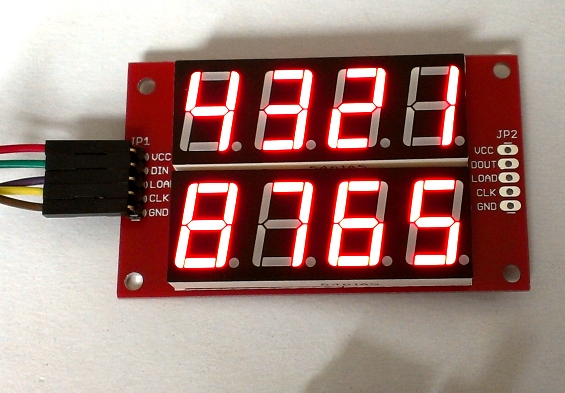
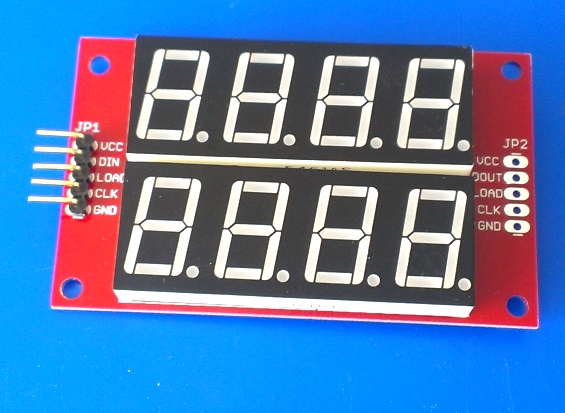
This display board (SPI7SEGDISP8.56-2R) features eight 7-segment displays arranged in two rows of four digits. The on-board MAX7219 driver enables you to control all LED segments through only 3 I/O pins of microcontroller. The major advantage of using this board is the time-division multiplexing operations required for continuous refreshing of the display digits are performed by the MAX7219 chip, thereby keeping the microcontroller free for doing other pressing tasks. The double row arrangement is suitable for many projects where two variable values are to be displayed simultaneously, such as displaying temperature and humidity, or current and voltage, etc.

SPI7SEGDISP8.56-2R: MAX719-based seven segment LED display module
Key Features:
- 3-wire SPI interface
- double row of 4-digit displays (0.56″)
- operates at +5V supply
- individual control of all digits and decimal points
- 16 levels of display brightness through software
- PCB dimensions 2.8″ x 1.7″ (70mm x 42mm)
- Two or more of these modules can be cascaded in series
Since it requires only 3 I/O pins, this display module can also be used with low pin-count microcontrollers (such as PIC12F series). Visit my MAX7219 tutorial page for more detail on MAX7219 and PIC12F683 interfacing example. With Arduino, it can be easily interfaced using the LedControl library. The following Arduino sketch displays 1 through 8 on eight LED digits of SPI7SEGDISP8.56-2R. It uses Arduino pins 7, 6, and 5 to drive the DIN, CLK, and LOAD pins of MAX7219, respectively.
#include "LedControl.h" // Pin 7 to Data In, 6 to Clk, 5 to LOAD LedControl lc=LedControl(7,6,5,1); void setup() { // the zero refers to the MAX7219 number, it is zero for 1 chip lc.shutdown(0,false);// turn off power saving, enables display lc.setIntensity(0,15);// sets brightness (0~15 possible values) lc.clearDisplay(0);// clear screen } void loop() { for(int i=0; i<8; i++){ lc.setDigit(0,i,i+1,false); } } |
This display module is on sale for $12.99 on Tindie, and it is available in three LED colors: Red, Blue, and Yellow. The buying links are provided at the end.

SPI7SEGDISP8.56-2R (Red)

SPI7SEGDISP8.56-2R (Blue)

SPI7SEGDISP8.56-2R (Yellow)
Tindie buying links:
SPI7SEGDISP8.56 buying link – Red color
SPI7SEGDISP8.56 buying link – Yellow color
SPI7SEGDISP8.56 buying link – Blue color
PCB Only
If you buy PCB only, you will need the following components to complete the display.

Bill of materials for assembling the display
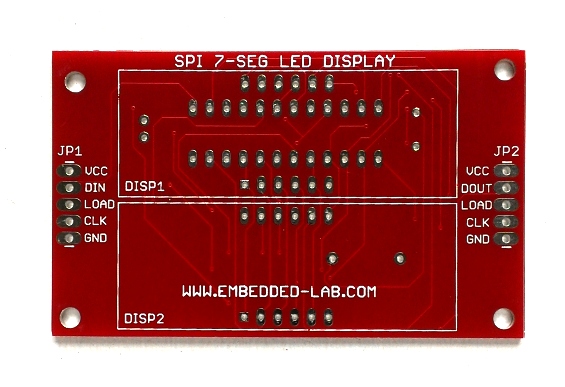
Top side of PCB
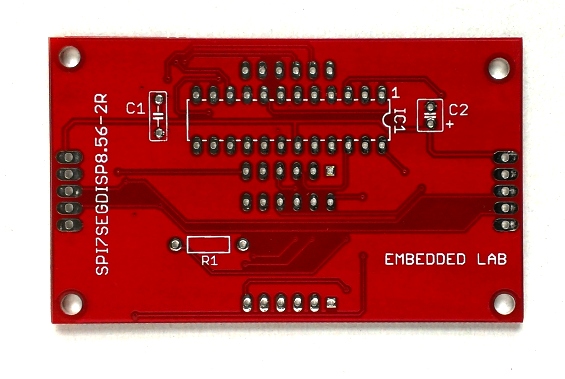
Bottom side of PCB
While assembling the board, start from the bottom side of the PCB that contains all electronics components. The displays are soldered last on the top PCB side along with the header pins.
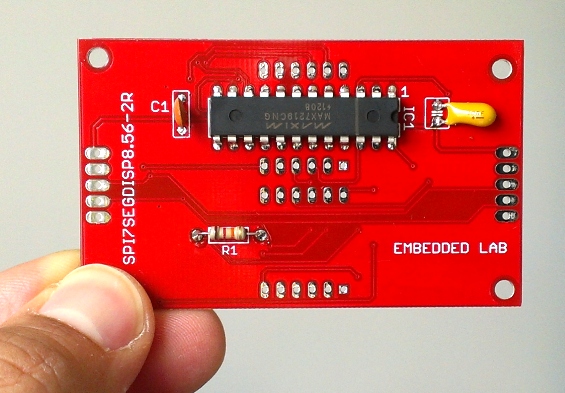
All electronics components should be soldered first on the bottom side PCB.
Displays are soldered last on top side
|
|
Pingback: Step-by-step guide for making a very simple temperature and humidity meter with 7-segment LED displays -Use Arduino for Projects
re: 4 digit LED displays:
Single row 0.56″
– does this come in a kit?
– is there just single pcb available?
– there is no reference to the red, blue colors for ordering.
Double row 0.56″
– does this come in a kit?
** Idea of the kit is that I want the display(s) removable so I would use headers on the LED lines.
Tnx.
Jim.
Good morning,
Do you have this product in another size?
I need a display like this (with 2 rows), but with 4 ”
Thanks
I have pcb only for that. Check it out here
https://www.tindie.com/products/rajbex/serial-driver-for-large-seven-segment-led-display-modules/
Your tindie links are not working…
Now, it’s working. Thank you.