Yet another home automation project

Saiyam’s bedroom automation box is a standalone and multi-feature home automation project using Arduino with a set of six sensors which can be used in combination with each other to control home appliances like fans, coolers, lightening systems, etc.
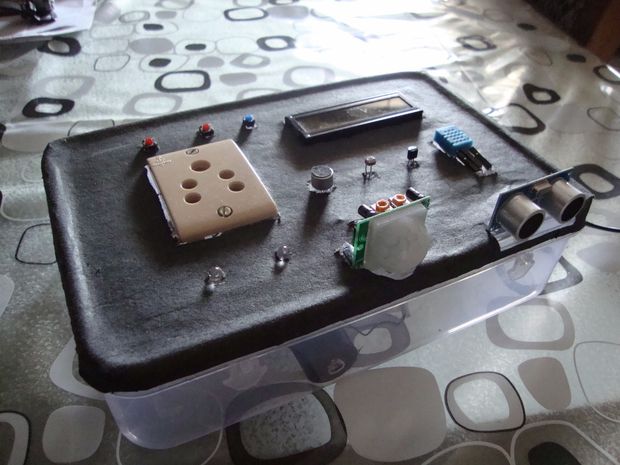
Home automation using Arduino
You just need to connect your appliance to the power socket present on the box with a plug that makes connecting anything easily. The device asks you to set a mode which means, which sensor you want to use for controlling the output (see all the modes below). Further it asks you to threshold for the sensor you have chosen (like threshold temperature for temperature sensor) which on crossing that threshold, the appliance connected either turns on or off (depending on the sensor). But that’s not it! This device can also protect your valuables at night by switching on the security mode. Still not over! It also has a timer mode in which you can just set the time in hours and minutes you want your device to be switched on. Just one more. It can also act as a weather station by sending you the temperature and humidity of the place that it is kept.