Author Archives: R-B

RF detection using a common LED

Hardware hacker b.kainka has posted on Hackaday.io a very interesting trick of detecting a RF signal using an everyday LED and ATtiny13 microcontroller (other microcontrollers should work too).

I am using the ATtiny13 on the Sparrow board. https://hackaday.io/project/4926-cheepit-sparrow-dev-boards-for-smartphones LED2 is connected to port B.3 which is ADC(3) as well. So why not connect an Antenna here. The LED should work as a detector diode. A bias voltage is needed. So I should switch on the internal pullup.

Now it works fine! Don’t believe it? Watch the video. To get it sensitive enough I had to use one more trick. I switch on the pullup for a very short time. This will charge the LED which is also a little capacitor of only a few picofarads. Voltage may rise up to 2 V. Then I switch back to high Z. The LED is discharged down to about 1.5 V after some microseconds. But in the presence of an RF signal it will discharge a little lower. Several RF pulses may result in an integrated loss of LED voltage. That’s why I call it an integrating RF detector. In the end I need something like 50 mV at 100 kHz to get a clear result.

RF detection using a common LED

RF detection using a common LED

Quick Review of a cheap Chinese component tester

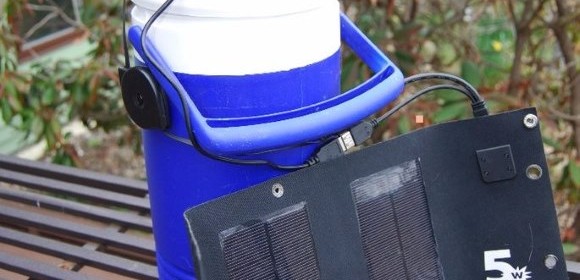
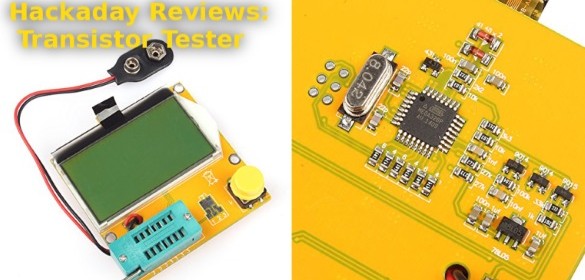
Adam Fabio has posted a quick review of a cheap Chinese brand multifunctional component tester on Hackaday. He found its build quality was very cheap, but he was also amazed with its features and functionalities, including ohmmeter, capacitance meter, transistor tester, etc, which worked amazingly well with a reasonable accuracy. Powered with Atmega328 microcontroller, this component tester can be purchased for ~ $20 on eBay and Aliexpress.

Transistor tester

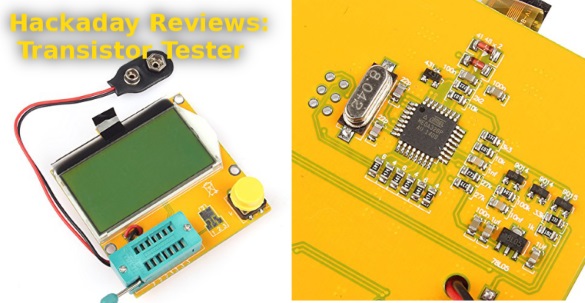
Inexpensive Transistor tester from China

I didn’t have huge expectations for the tester, but I hoped it would at least power up.  Hooking up a 9 volt battery and pressing the magic button brought the tester to life. Since I didn’t have anything in the socket, it quickly lit up and displayed its maker information – “91make.taobao.com”, and “By Efan & HaoQixin”, then it informed me that I had “No, unknown, or damaged part”.

I had a few resistors lying around the bench (doesn’t everyone?) so I put one in. The tester read it as 9881 ohms. Sure enough, it was a 10K 5% resistor.  Capacitors – ceramic disc, electrolytic, and surface mount all worked as well. The tester even provided ESR values. The real test would be a transistor. I pulled an old  2N2222 in a TO-18 metal can, and popped it in the tester. The damn thing worked – it showed the schematic symbol for an NPN transistor with Collector, Base, and Emitter connected to Pins 1,2,and 3 respectively. Flipping the pins around and re-testing worked as well. The tester showed hFe as 216, and forward voltage as 692 mV, both reasonable numbers for a 2N2222.

DIY bike speedometer

Check out this detailed build of Arduino-powered speedometer to monitor your bike speed on road. The project uses a reed switch to sense the rotation of one of the bike’s wheels. The Arduino reads in the reed switch closings and calculates the bike speed in mph. The calculated speed is displayed on a LCD screen. The speedometer is calibrated by defining the radious of the wheel in the firmware.

Arduino bike speedometer

Arduino bike speedometer

Secure both the magnet and reed switch to your bike wheel with electrical tape (either wheel is fine).  As shown in the images above, the magnet connects to one of the tire spokes and the reed switch connects to the frame of the bike.  This way, each time the bike wheel turns the magnet moves past the switch. Connect the leads form the reed switch to the long wires from your protoboard (orientation does not matter here- it’s just a switch)

Onion Omega: Another WiFi dev board for IoT applications

Only 1/4 the size of the Raspberry Pi computer, Onion Omega is the latest and most promising open hardware development platform for WiFi based IoT applications. It comes with built-in WiFi, Arduino-compatible and it runs full Linux. It lets you prototype hardware devices using familiar tools such as Git, pip, npm, and using high level programming languages such as Python, Javascript, PHP. The Onion Omega is fully integrated with the Onion Cloud, making it a breeze to connect physical devices to the Web to create Internet of Things applications.

Congratulations to the Onion Team for far surpassing their Kickstarter funding goal, while there are still 11 days for the campaign to go.

Omega1

Onion Omega is only 1/4 the size of RPi

Features

Onion Omega Features

Onion Omega features:

  • Dimensions: 28.2mm x 42mm (1.1″ x 1.7″)
  • CPU: Atheros AR9331 400MHZ MIPS 24K
  • RAM: 64MB DDR2 400MHz
  • Flash: 16MB
  • WiFi: 802.11b/g/n 150Mbps
  • Ethernet: 100Mbps
  • GPIO: 18
  • USB: USB 2.0, Supports additional USB Hub
  • Power: 3.3V
  • Antenna: PCB Antenna w/ uFL Connector
  • Power Consumption: 0.6W


« Older Entries Recent Entries »