Category Archives: chipKIT


ChipKIT Project 6: BME280 Weather Station

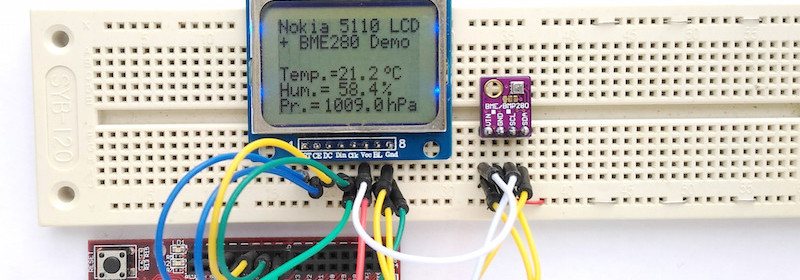
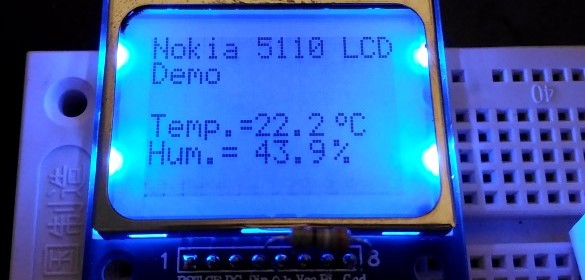
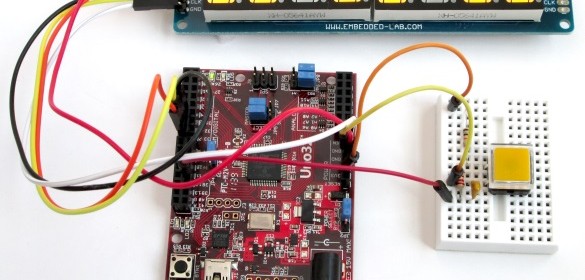
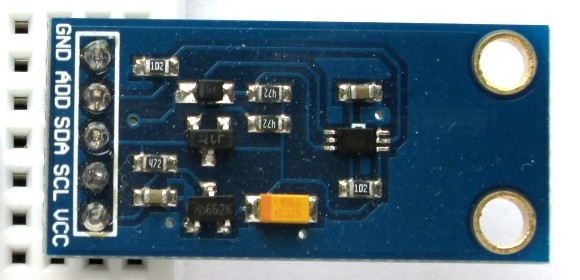
BME280 is a fully integrated environmental unit from Bosch that combines sensors for pressure, humidity, and temperature in a tiny 8-pin metal-lid LGA package of size 2.5 x 2.5 x 0.93 mm³. Because of its compact size, ease of use (BME280 supports standard I2C and SPI interfaces), and availability of supporting open-source Arduino libraries, BME280 is very popular among weather enthusiasts. This project describes how to read barometric pressure, relative humidity, and temperature measurements from BME280 using chipKIT Uno32 to make a standalone weather station. The sensor readings are acquired over an I2C bus and are displayed on a Nokia 5110 LCD display.

Read more

chipKIT Tutorial 7: Using Nokia 5110 LCD

In Tutorial 4, we learnt interfacing an HD44780-based LCD to a chipKIT board for displaying alphanumeric output. Today, we will see how to connect a NOKIA 5110 graphical LCD (used in Nokia 5110 cell phones), which is a 84×48 pixel monochrome display of about 1.5″ diagonal in size. The display can be used for graphics, text, and bitmaps. Theory Nokia 5110 LCD was used in Nokia’s popular 5110 and 3310 model cell phones. It is a 48×84 pixels matrix LCD driven by the low-power PCD8544 controller chip. It is powered by 3.3V and includes on-chip generation of LCD supply and bias voltages, thus requiring minimum external components

Read more

Introducing Easy Pulse Plugin: A breadboard friendly and Arduino/chipKIT compatible pulse sensor

Today we are happy to announce the release of a new addition to our Easy Pulse Sensor series named Easy Pulse Plugin. Like its predecessors, the original Easy Pulse and Easy Pulse V1.1, Easy Pulse Plugin also operates on the principle of Photoplethysmography, which is an optical technique of sensing blood volume changes in tissues by illuminating the skin surface with a light source and measuring the reflected or transmitted light using a photodetector. The photodetector output contains the cardiovascular pulse wave, which is synchronized with the beating of the heart. Easy Pulse Plugin provides all necessary instrumentation and amplification on

Read more

chipKIT Project 5: Digital stopwatch on seven segment LED display

In this project, we will use the chipKIT Uno32 board to build a digital stopwatch capable of timing minutes, seconds, and 1/10th of seconds, and with a basic start and stop control feature. A MAX7219-driven 8-digit seven segment LED display is used to display the time elapsed. The Reset switch on the Uno32 board will be used to reset the current time back to 0 when the stopwatch is stopped.

Read more

chipKIT Project 4: Digital light meter

A light meter is used to measure the intensity of illumination in a given area. It is widely used in schools, warehouses, factories, hospitals, office buildings, museums, art-galleries, parking garages, stadiums, and many more, to measure and maintain proper lighting levels. The intensity of illumination is usually expressed in Lux or foot-candles. As the 4th project in our chipKIT tutorial series, today we are going to build a digital light meter using the chipKIT Uno32 board and the BH1750 digital light sensor. This project uses Digilent’s chipKIT Basic I/O shield for displaying the measured light intensity in Lux, foot-candles, and Watts/m^2 units.

Read more
« Older Entries