Netduino Day 3 – Multiplexed Seven-Segment LED displays
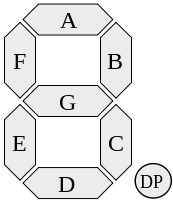
A visual output always adds value to any project. In this third day tutorial, we are going to display some numeric, alphabetic as well as two symbolic characters on a 4-digit seven segment LED module. The way we are interfacing the seven segments LEDs is known as multiplexing, which allows to save some I/O pins of Netduino as compared to driving them individually. The seven segment LEDs are resource and power hungry, but we are going to do this experiment just to get our feet wet in the microcontroller or embedded world and to understand the basics of a seven segments LED displays.

Seven Segments LED displaying Letter 'A'