Tag Archives: PIC Projects


Microcontroller based Diode and Bipolar Junction Transistor (BJT) tester
Introduction

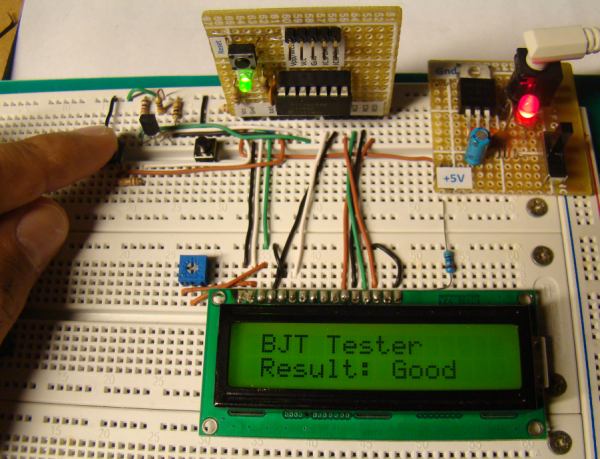
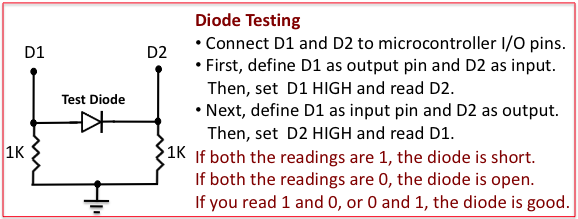
Most of the digital multimeters these days have built-in features for testing diodes and sometimes transistors. The purpose of this project is to demonstrate a simple way to construct a testing device for diodes and bipolar junction transitors (BJTs) using a microcontroller. The testing algorithm is based on a simple fact that a working PN junction conducts current in only one direction. A PIC16F688 microcontroller is used in this project that switches the bias voltage across the PN junctions of diode and transistors, and determines if a particular junction is normal, open or short.

Theory

The logic behind testing a diode is straightforward. A diode is a PN junction that allows the conduction of current only in one direction. Therefore, a good diode will conduct current in only one direction. If it does in both the directions, it means the diode is short, and if it does in neither direction, it is open. The circuit implementation of this logic is shown below.
Read more

PIC-based Digital Voltmeter (DVM)

Introduction

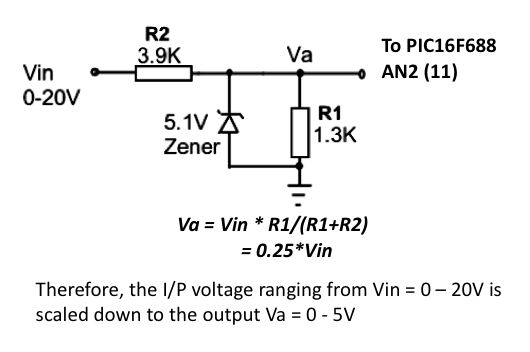
This project will describe how to make a simple digital voltmeter (DVM) using a PIC16F688 microcontroller. The range of this DVM is 0-20V, but you can easily increase or decrease the range of input voltage as your requirements after you understand the voltage scaling method described in this project. The PIC micro reads the input voltage through one of the 8 analog channels and convert it to a 10-bit digital number using the internal ADC. Doing some math with ADC conversion (you will see later), this number can be converted to the actual measured voltage. The voltage is displayed in an HD44780-based character LCD.

Circuit Diagram and Description

You cannot feed a 20V signal directly to a PIC microcontroller’s input channel. It is too higher than its operating voltage, and the microcontroller could be damaged. So, first we need a voltage scaler that will scale down the input voltage to the safe operating voltage range of PIC16F688. It can be achieved by a simple resistor divider network shown below.

Read more

Determine capacitance by measuring the charging time

There are many ways to determine the capacitance of a capacitor. You can use an oscillating circuit where the capacitor is a part of it and measure the frequency of oscillation to find the capacitance. Or, you can also use a resistor-capacitor network and measure the rate of voltage rise across the capacitor to determine the capacitance, if the value of the resistor is known.

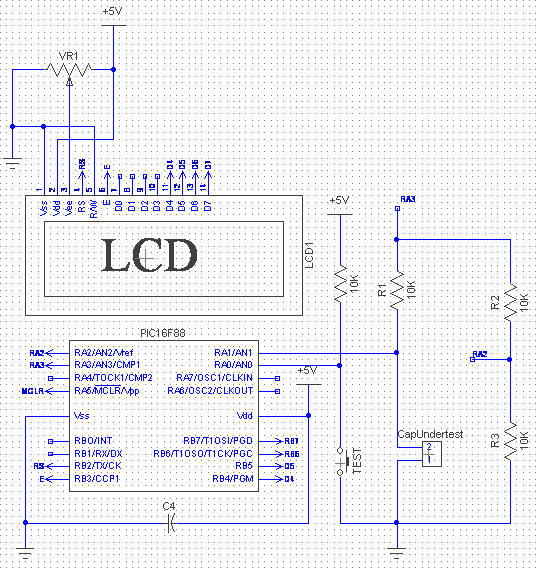
Here’s a similar project where a PIC16F88 microcontroller measures the time required by a capacitor to charge through a known resistor from 0 to half of the reference voltage provided, and the capacitance is determined based on that information.

Read more

Digital Thermometer Using PIC16F688 Microchip

Digital Thermometers are very popular projects among students and hobbyists. If you have just stepped into the world of embedded system design, this project is worth to do. You will experience how the physical variables are measured in embedded world with sensors and are displayed in human readable format on LCD displays.

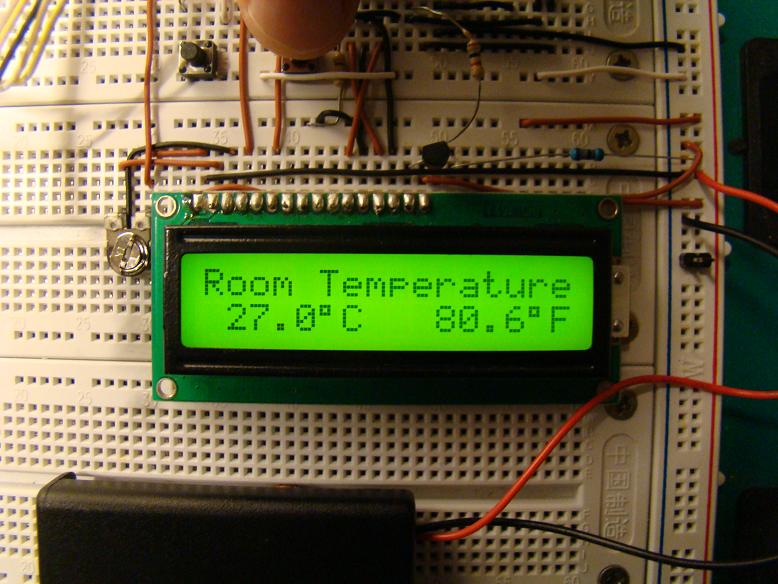
This project uses PIC16F688 Microchip as the main brain that reads the temperature measurements from DS1820, a digital temperature sensor from Maxim. DS1820 can measure temperatures ranging from -55 °C to +125 °C in 0.5°C increments. It is a digital sensor that provides temperature measurements in 9-bit digital format. The negative temperatures are provided in 2’s complement form. The author also provides the firmware, which is written in mikroC compiler. The temperature is displayed on a character LCD in Centigrade and Fahrenheit scales both.

Read more

Recent Entries »