Breadboard module for PIC16F628A
|
|
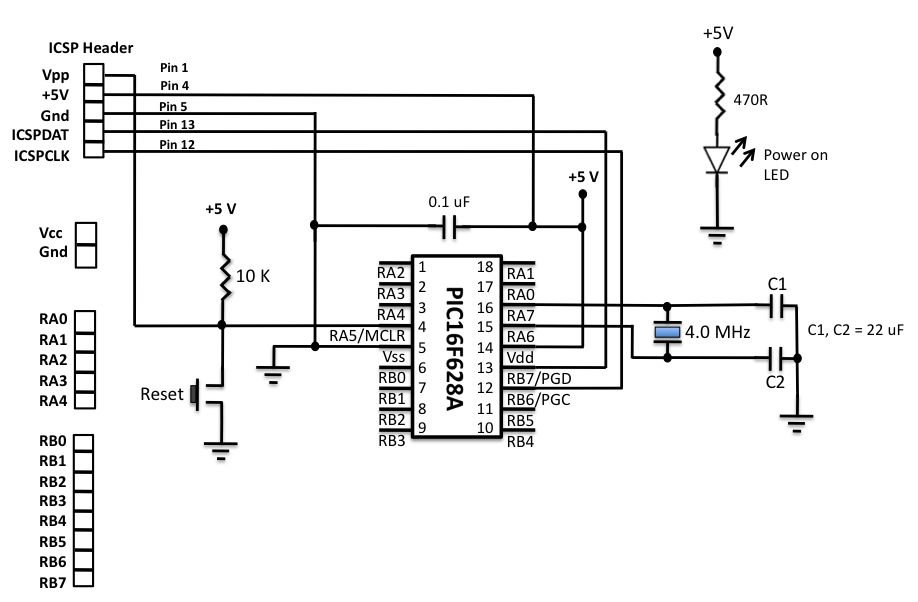
Here’s another breadboard module that carries a PIC16F628A microcontroller. The power supply pins and the I/O ports of the PIC16F628A microcontroller are accessed through male headers. It can be easily plugged into a breadboard and is very useful for quick prototyping. It frees up a lot of space on the breadboard since the oscillator, reset, and ICSP circuits are already built on the module. It is different from the previous PIC16F688 breadboard module in the way that the microcontroller now runs with an external 4.0 MHz crystal. So, this module will be more appropriate for experiments that require accurate timing calculations. Besides, the PIC16F628a microcontroller allows you to read/write 8-bit data directly through PORTB, which is 8-bit wide (none of the ports in PIC16F688 were 8-bit wide).
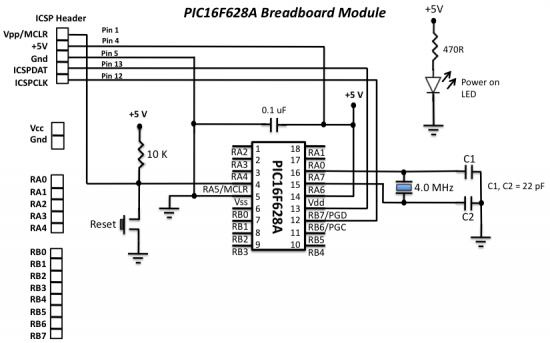
The layout and the circuit diagram of the module is shown below. The module has ICSP header pins for in-circuit programming, a reset switch, and an LED as power-on indicator. It provides easy access to all the pins of PORTB, and RA0 through RA4 pins of PORTA. Pins RA6 and RA7 are used for external crystal connections, whereas RA5 is input only pin and is used for reset circuit.
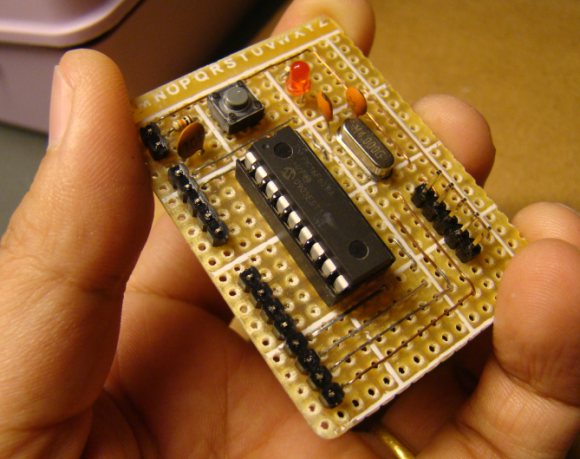
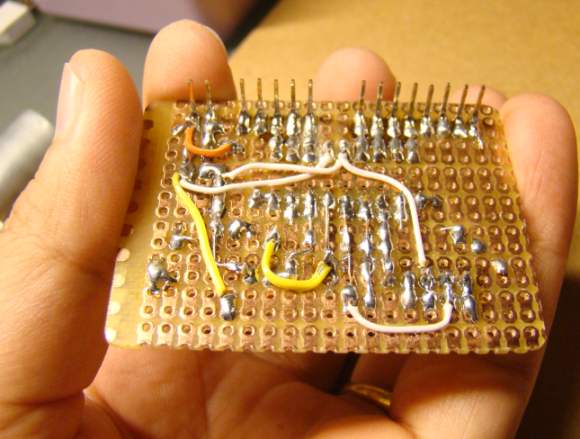
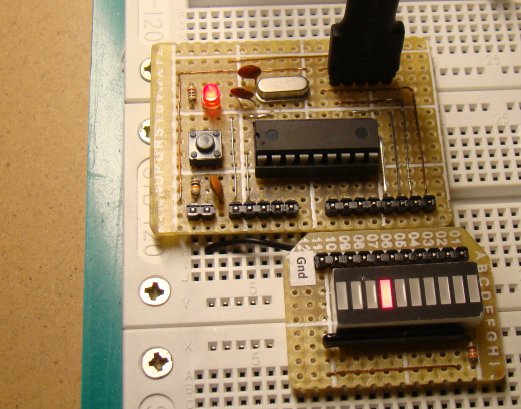
This circuit can be soldered on a general-purpose prototyping circuit board. Here are some pictures that I took of my finished board.
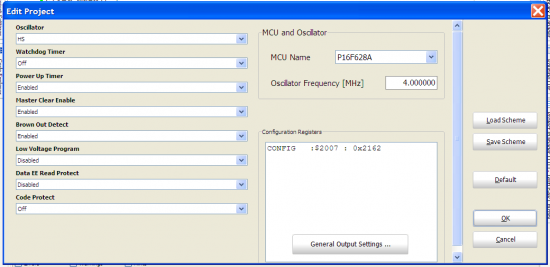
Now, the breadboard module is ready and its a time to test it. I have written a small application program to chase 8 LEDs that are connected to the PORTB pins of the PIC16F628A microcontroller. The circuit diagram is not shown here as it is very simple. The anodes of the 8 LEDs are connected to the PORTB pins, whereas the cathodes are grounded through 330 ? resistors in series. The program is written in C and is given below. I compiled it with MikroC Pro for PIC, and loaded the HEX file into the PIC16F628A microcontroller with my handy iCP01 USB programmer from iCircuit technology. In the configuration bit settings, MCLR should be enabled and the clock source could be XT or HS, both will work for 4.0 MHz.
Here is the test program in MikroC.
/*
Project: LED chaser program for testing the PIC16F628A module
Eight LEDs are connected to PORTB pins
Copyright @ Rajendra Bhatt
Dec 2, 2010
MCU: PIC16F628A
Oscillator: XT, 4.0000 MHz
MCLR Enabled
*/
unsigned short i, j;
void main() {
CMCON = 0x07; // Disable comparators
PORTB = 0x00; // Start with all zero O/Ps
TRISB = 0x00; // PORTB pins all O/Ps
do {
i = 1;
for(j=0; j<8; j++) {
PORTB = i;
Delay_ms(100);
i = i<< 1; // Left shift one bit
}
}while(1);
}
After the program is loaded, turn the power ON and watch the chasing LEDs.
|
|

Hi Sir,
How to upload code to pic16f628a microcontroller please reply me…
suganyaravi67@gmail.com
Hi R-B,
How to send C code to PIC16F628A …
How do you enable mclr. is it the master clear selelction?
thanks. and is it always pin 5(for reset)?
Consider adding a protection diode between +5V and the 10k resistor at the MCLR pin. See the ICSP documentation. It protects against Vpp (from the programmer) from damaging things connected to the +5V rail.
That’s a good suggestion. Thanks.
Yes there is – located at the power pins on the PCB at the bottom left. In addition to that one, I had to put another directly between pins 5 and 14 of the PIC.
Reset with the above circuit was problematical — would generally freeze on reset — until I added 0.1uF decoupling cap between VDD and VSS (pins 5, 14).
There’s a 0.1uF capacitor shown in the circuit diagram.
Pingback: Electronics-Lab.com Blog » Blog Archive » Breadboard module for 18-pin PIC16F microcontrollers
Pingback: Breadboard module for 18-pin PIC16F microcontrollers (PCB version) » Geko Geek
brother please send me code for 00 to 3600 minutes or maximum value possible and please guide me how to define range of the timer.
waiting for a positive response.
regards
Pingback: 00 to 99 minute timer using PIC16F628A microcontroller » Geko Geek
Pingback: Electronics-Lab.com Blog » Blog Archive » 00 to 99 minute timer using PIC16F628A microcontroller
Pingback: DIY plug-in modules to make microcontroller breadboarding easier » Geko Geek
Just finished my own breadboard module for this PIC :D. It doesn’t look as good as yours but it works 😛
I’m not using an external xtal as I intend to use the one included in the pic, I will be posting pictures on my blog soon. thanks!
hey,
thnx for such a fast response …
i have tried dis before but i din’t find this working…
dear,
Rajendra Bhatt….
can you provide me the circuit diagram for the pic16f628a programmer circuit….
you have mentioned here that you had used the ” handy iCP01 USB programmer from iCircuit technology ‘ but right now i would like to build that my self ….
waiting for the positive response…
i even have search about this through google but unable to perform…
thanks
gaurav,
I am sorry I don’t have a circuit for PIC16F628A programmer. But you can try JDM PIC programmer circuit. Here’s one link:
http://www.instructables.com/id/Simple-JDM-PIC-Programmer/