Using BMP180 for temperature, pressure and altitude measurements
|
|
The BMP180 is a new generation digital barometric pressure and temperature sensor from Bosch Sensortec. In this tutorial, we will briefly review this device and describe how to interface it with an Arduino Uno board for measuring the surrounding temperature and pressure. We will also discuss about retrieving the sensor altitude from its pressure readings.
Temperature, pressure and altitude measurements using BMP180
Experiment setup
Bosch Sensortag’s BMP180 is an ultra low-power digital temperature and pressure sensor with high accuracy and stability. It consists of a piezo-resistive sensor, an analog to digital converter and a control unit with EEPROM and a serial I2C interface. The raw measurements of pressure and temperature from the BMP180 sensor has to be compensated for temperature effects and other parameters using the calibration data saved into the EEPROM. In this tutorial, we will use an Arduino board to read the temperature and barometric pressure measurements from the BMP180 sensor and display the data on an 1.44″ ILI9163-based TFT display. If you would like to repeat this experiment, you will need the following things.
1. Any Arduino board running at 3.3V. I am using Crowduino Uno board from Elecrow, which has an onboard slide switch to select the operating voltage between 3.3V and 5.0V. If you want to use this board, make sure the switch is slided to 3.3V position.
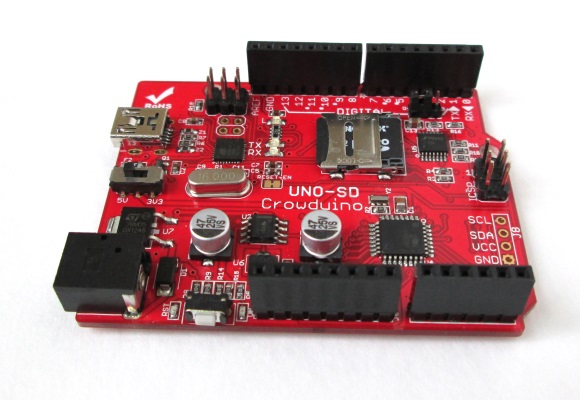
Crowduino Uno board from Elecrow
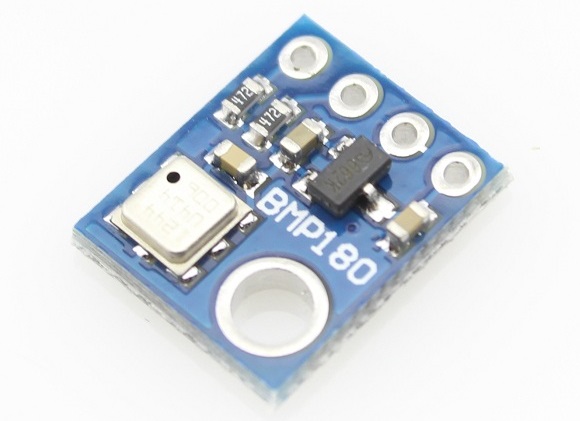
BMP180 sensor breakout module
3. ILI9163-based TFT display (I am using one with 1.44″ size display from Elecrow).
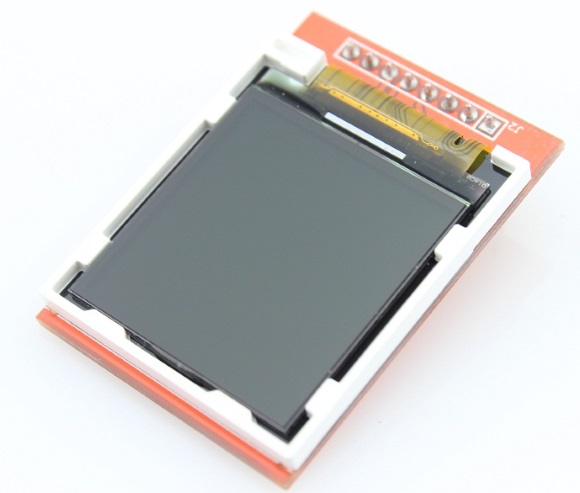
1.44″ TFT display (ILI9163 driver)
4. A breadboard and few jumper wires for hooking up the sensor and the display to the Arduino board.
The following diagram describes the experimental setup for this tutorial. The BMP180 and the TFT display are both powered by 3.3V. The BMP180 supports I2C interface and therefore the SDA and SCL pins go to A4 and A5 pins of the Arduino board. The ILI9163 TFT driver supports SPI interface. The table shown on the right side of the diagram below describes the wiring between the display and Arduino. The I2C and SPI pin names are printed on the bottom layer silkscreen of the BMP180 and the TFT display modules.
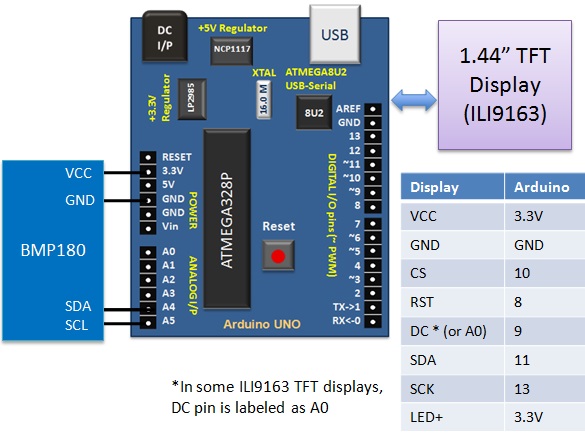
Sensor and display setup
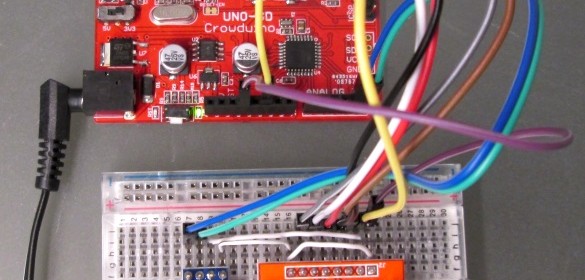
Here is the actual setup for this experiment made on a breadboard.
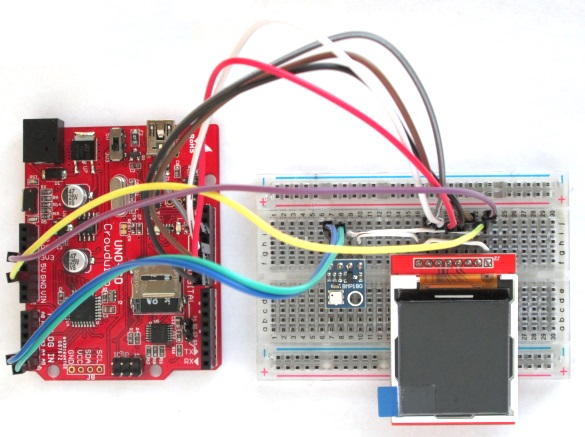
BMP180 sensor hookup with Arduino
Arduino firmware
For sensor readings, I am using the BMP180 Arduino Library from Love Electronics Ltd (I am not sure if this company exists now or not bu that’s what it says in the library). You need to download it (link provided below) and install this library into your Arduino/libraries/ location.
For the ILI9163 TFT LCD, I am using another free and open source Arduino Library called TFT_ILI9163C, which you can download from the following link.
Download TFT_ILI9163C Arduino Library
The TFT library uses Adafruit_GFX libraries for fonts, so you need to download and install it too.
After installing both of these libraries, it’s time to write firmware for the Arduino. The firmware I have written and shared below displays temperature in Celsius and Fahrenheit scales and barometric pressure in millibar and inHg. In order to compute the sensor altitude, we need to know the reference surface pressure value as discussed in the following section.
Important Note about retrieving sensor altitude
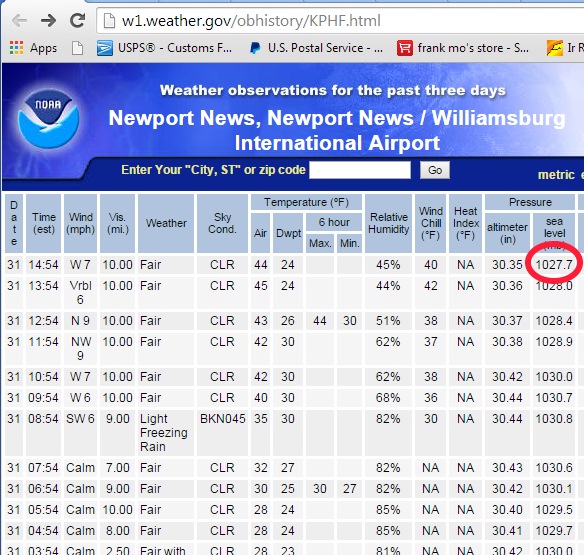
Mean sea-level pressure data
Here is a complete Arduino code for this project. I would recommend to use the download file below instead of copying and pasting the code from here, which does not work sometime.
#include <Wire.h>
#include <BMP180.h>
#include <SPI.h>
#include <Adafruit_GFX.h>
#include <TFT_ILI9163C.h>
// Define pins for ILI9163 SPI display
#define __CS 10
#define __DC 9 // Labeled as A0 in some modules
#define __RST 8
// Connect SDA to Arduino pin 11 (MOSI), and SCK to 13 (SCK)
// Color definitions
#define BLACK 0x0000
#define BLUE 0x001F
#define RED 0xF800
#define GREEN 0x07E0
#define CYAN 0x07FF
#define MAGENTA 0xF81F
#define YELLOW 0xFFE0
#define WHITE 0xFFFF
#define TRANSPARENT -1
TFT_ILI9163C display = TFT_ILI9163C(__CS, __DC, __RST);
// Store an instance of the BMP180 sensor.
BMP180 barometer;
// Store the current sea level pressure at your location in Pascals.
float seaLevelPressure = 102770; // Williamsburg, VA on Dec 31, 2014, 14:54 Eastern Time
void setup()
{
 display.begin();
 display.setBitrate(24000000);
 display.setRotation(2);
 display.clearScreen();
 // We start the serial library to output our messages.
 Serial.begin(9600);
 // We start the I2C on the Arduino for communication with the BMP180 sensor.
 Wire.begin();
 // We create an instance of our BMP180 sensor.
 barometer = BMP180();
 // We check to see if we can connect to the sensor.
 if(barometer.EnsureConnected())
 {
 Serial.println("Connected to BMP180."); // Output we are connected to the computer.
 // When we have connected, we reset the device to ensure a clean start.
 barometer.SoftReset();
 // Now we initialize the sensor and pull the calibration data.
 barometer.Initialize();
 }
 else
 {
 Serial.println("No sensor found.");
 }
}
void loop()
{
 if(barometer.IsConnected)
 {
 // Retrive the current pressure in Pascals.
 long currentPressureP = barometer.GetPressure();
 float currentPressuremb = currentPressureP/100.0;
 float currentPressureinHg = currentPressuremb*0.02953;

 // Print out the Pressure.
 Serial.print("Pressure: ");
 Serial.print(currentPressureP);
 Serial.println(" Pa");
 Serial.print("Pressure: ");
 Serial.print(currentPressuremb);
 Serial.println(" mbar");
 Serial.print("Pressure: ");
 Serial.print(currentPressureinHg);
 Serial.println(" inHg");
 // Retrive the current altitude (in meters). Current Sea Level Pressure is required for this.
 float altitudem = barometer.GetAltitude(seaLevelPressure);
 float altitudeft = altitudem*3.2808;
 // Print out the Altitude.
 Serial.print("\tAltitude: ");
 Serial.print(altitudem);
 Serial.print(" m");
 Serial.print("\tAltitude: ");
 Serial.print(altitudeft);
 Serial.print(" ft");

 // Retrive the current temperature in degrees celcius.
 float currentTemperatureC = barometer.GetTemperature();
 float currentTemperatureF = (9.0/5.0)*currentTemperatureC+32.0;
 // Print out the Temperature
 Serial.print("\tTemperature: ");
 Serial.print(currentTemperatureC);
 Serial.write(176);
 Serial.print("C");
 Serial.print(currentTemperatureF);
 Serial.write(176);
 Serial.print("F");
 Serial.println(); // Start a new line.

 // Now display results on LCD

 display.fillScreen();
 display.setCursor(0, 0);
 display.setTextColor(WHITE);
 display.setTextSize(1);
 display.print("BMP180 Sensor Demo");

 // Display temperature in F
 display.setCursor(0, 16);
 display.setTextColor(YELLOW);
 display.setTextSize(2);
 display.print("T=");
 display.print(currentTemperatureF);
 display.setTextSize(1);
 display.print(" o");
 display.setTextSize(2);
 display.print("F");
 // Display temperature in C
 display.setCursor(24, 32);
 display.print(currentTemperatureC);
 display.setTextSize(1);
 display.print(" o");
 display.setTextSize(2);
 display.print("C");

 //Now display pressure in mbar
 display.setCursor(0, 48);
 display.setTextColor(CYAN);
 display.setTextSize(2);
 display.print("P=");
 display.print(currentPressuremb,1);
 display.print("mb");
 // Display pressure in inHg
 display.setCursor(24, 64);
 display.setTextColor(CYAN);
 display.print(currentPressureinHg,1);
 display.print("inHg");

 //Now display pressure in mbar
 display.setCursor(0, 80);
 display.setTextColor(WHITE);
 display.setTextSize(2);
 display.print("H=");
 display.print(altitudeft,1);
 display.print("ft");
 // Display pressure in inHg
 display.setCursor(24, 96);
 display.setTextColor(WHITE);
 display.print(altitudem,1);
 display.print("m");

 delay(5000); // Show new results every second.
 }
}
Download the Arduino sketch here
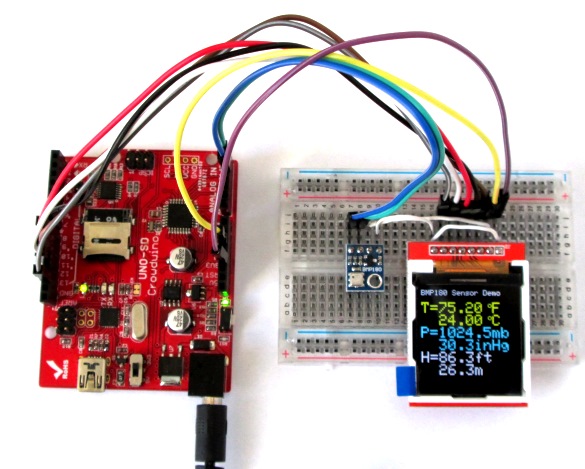
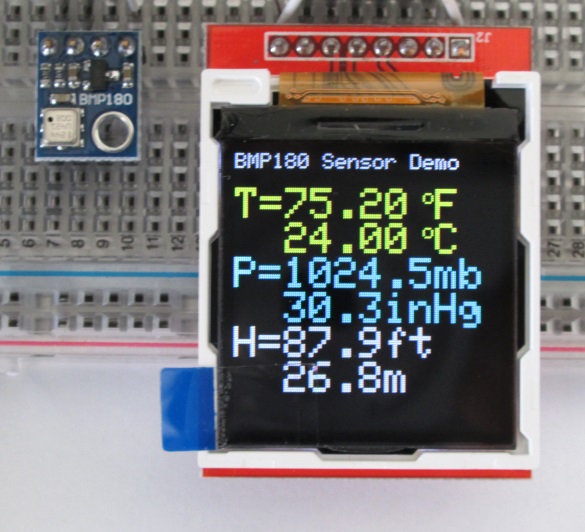
Output
The sensor altitude shown was about 88 feet above the sea level, which seems to be right as compared to the city data published here: http://en.wikipedia.org/wiki/Williamsburg,_Virginia
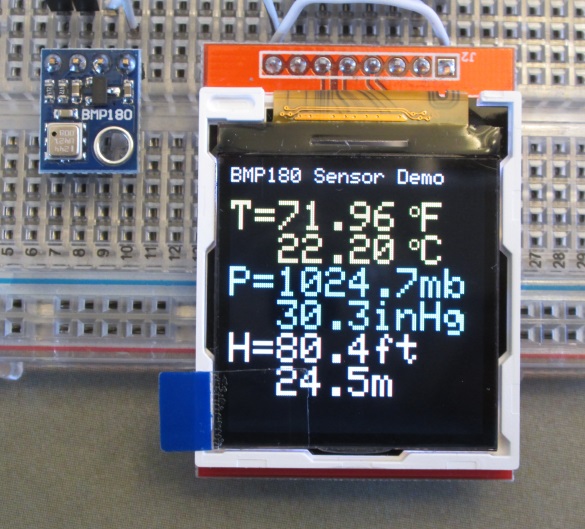
Second floor measurements
The sensor is very sensitive to altitude. The following measurement was taken by placing the sensor on my dining table in the first floor. The altitude was reduced by ~8 feet, which seems to be reasonable.
First floor measurements
|
|
I modified the code to achieve the functionality of this project and published my YouTube channel
https://youtube.com/shorts/BWmmfJeZp4Y?si=9iYEtBnC5NPmCYCI
Hello
I wanted to try the program seen at this address:
file: /// C: /Users/Silvano/Desktop/ARDUINO_di%20tutto/Using%20BMP180%20for%20temperature,%20pressure%20and%20altitude%20measurements%20-%20Embedded%20Lab.html
but unfortunately gives me this error despite having inserted the libraries you recommended:
Arduino: 1.8.5 (Windows 7), Card: “Arduino Nano, ATmega328P”
In file included from C: \ Users \ Silvano \ Documents \ Arduino \ sketch_jan03a \ sketch_jan03a.ino: 2: 0:
C: \ Users \ Silvano \ Documents \ Arduino \ libraries \ bmp180 / BMP180.h: 26: 26: fatal error: ../Wire/Wire.h: No such file or directory
#include “../Wire/Wire.h”
^
compilation terminated.
exit status 1
Error compiling for the Arduino Nano card.
This report could be richer in information by enabling the option
“Show detailed output during compilation”
in “File -> Settings”
Can you tell me why I try to compile me this?
Thank you and goodbye
Silvano G.
italy
Thanks.
How can I use my Arduino Uno which is 5V, for this.
portable pc sourcing.
Pingback: Using BMP180 for temperature, pressure and altitude measurements -Use Arduino for Projects
Pingback: Using BMP180 for temperature, pressure and altitude measurements - Electronics-Lab
Thanks for good description! ) It worked fine in my setup.
There is small error in the sketch (description comments)
//Now display pressure in mbar (guess it should be altitude in ft)
display.setCurso……(“H=”)
// Display pressure in inHg (guess it should be altitude in m)
display.setCurs……print(“m”)
Pingback: Using BMP180 for temperature, pressure and altitude measurements - Arduino collector blog
Pingback: BLOG | Temperature, Barometric Pressure, and Altitude meter using Crowduino and BMP180 sensor