In previous tutorials, we explored how to connect an SSD1306-based I2C OLED to ESP8266 for displaying texts and graphics, as well as to setup an ESP8266-based web server. This tutorial combines the knowledge gained before to make a standalone weather station that will display the local weather data on an OLED screen. In addition, the weather station will also run a web server that would allow a remote computer to access the weather data via web browser.
BME280 weather station
Hardware Setup
This project uses the EasyESP-1 board and the following hardware devices.
BME280 sensor module: BME280 is a fully integrated environmental unit from Bosch that combines sensors for pressure, humidity, and temperature in a tiny 8-pin metal-lid LGA package of size 2.5 x 2.5 x 0.93 mm³. Because of its compact size, ease of use (BME280 supports standard I2C and SPI interfaces), and availability of supporting open-source Arduino libraries, BME280 is very popular among weather enthusiasts. You can buy a BME280 sensor module in Grove form factor from Elecrow.
SSD1306 I2C OLED module: As described in Tutorial 3, the SSD1306 OLED controller supports both SPI and I2C interfaces. We will use an I2C version with a 0.96″ diagonal length and 128×64 monochrome pixels OLED Grove board. Despite its small size, the readability is pretty good due to its high contrast.
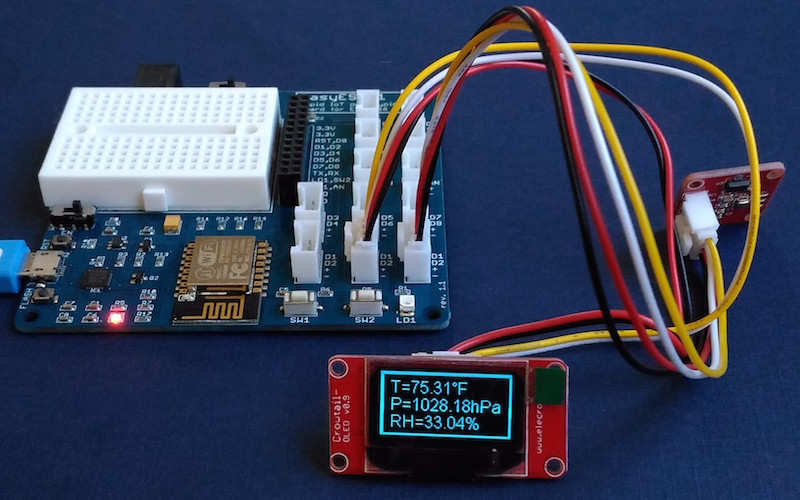
For this experiment, the 4-pin Grove connectors of BME280 and OLED modules are directly plugged into the two I2C ports on the EasyESP-1 board, as shown below. This connects the the SDA and SCK pins of BME280 and OLED modules to D2 and D1 pins of EasyESP-1, respectively.
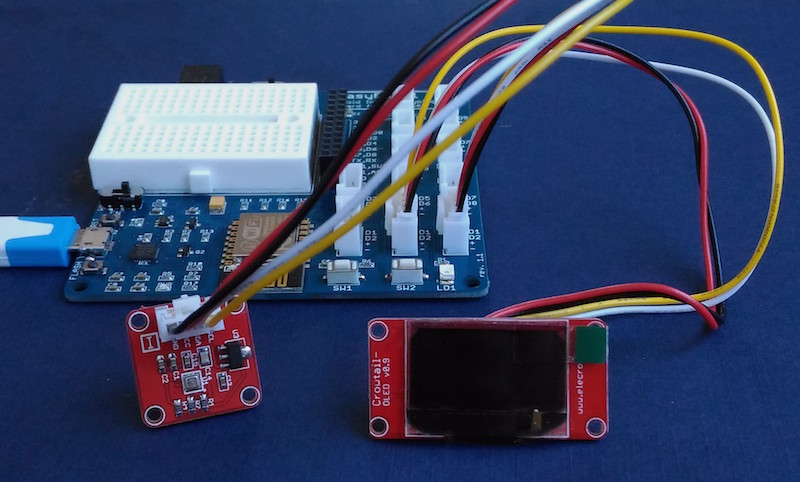
Complete project setup
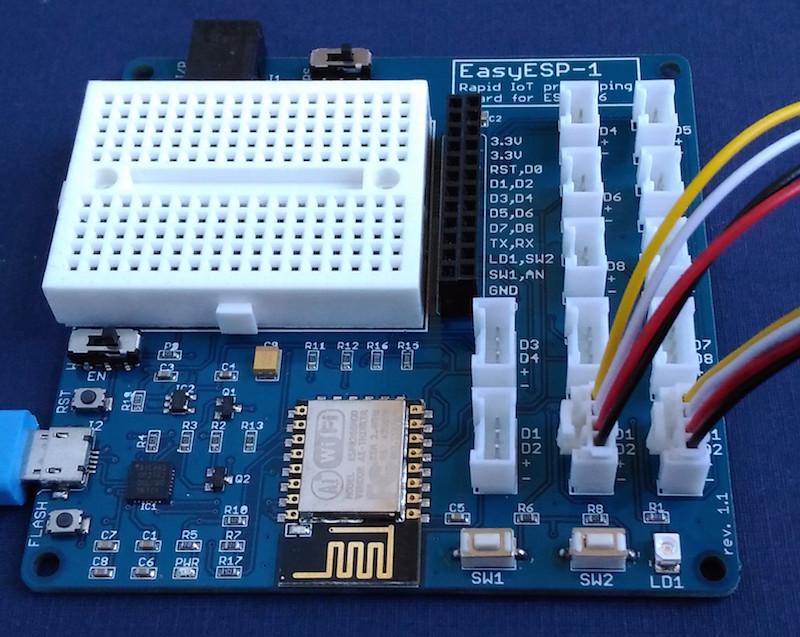
BME280 and OLED connections to I2C Grove ports
Software
The ESP8266 firmware for this project is developed using Arduino IDE. You need to install the ESP8266 core to enable the Arduino IDE for ESP8266 programming. Instructions can be found here. You will also need the following Adafruit libraries for reading data from the BME280 sensor. The I2C address of BME280 sensor on Elecrow’s sensor board is 0x77, which is also the default address set in the Adafruit’s library.
Adafruit unified sensor library
Adafruit BME280 library
Besides, you also need Daniel Eichhorn‘s OLED library for ESP8266. Read Tutorial 3 for more details on this.
The complete code for this weather station project can be downloaded from the following link:
Download BME280 Weather Station Code
The code for a very basic HTML webpage with the BME280 sensor output and auto refresh meta tag is included in the code. Note that you need to edit the SSID name and password in the program to match with your WiFi network before uploading it to the EasyESP-1 board.
Output
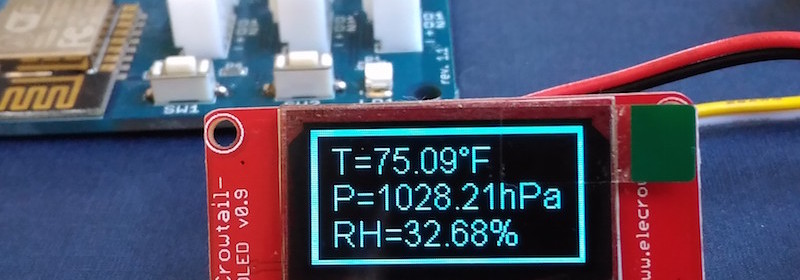
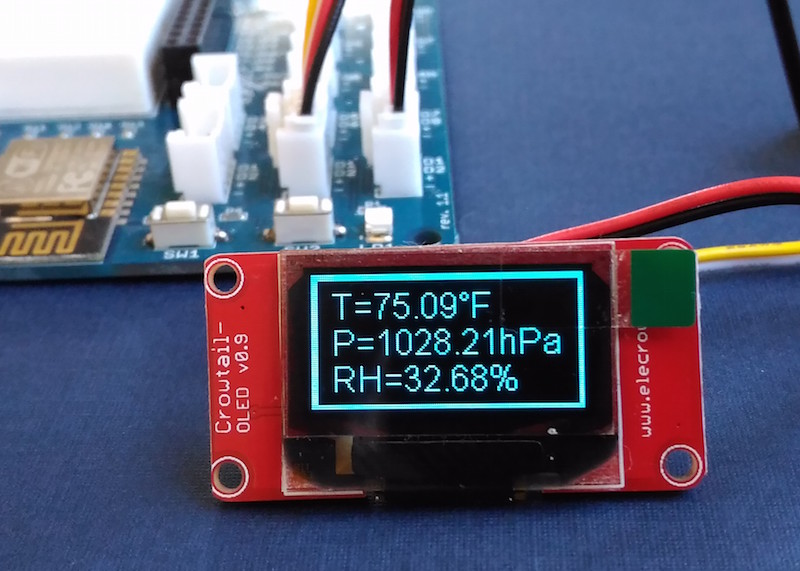
After uploading the program to EasyESP-1, when the ESP8266 restarts it prints out on the serial monitor the local IP address that was allocated to it in the WiFi network. The BME280 sensor readings for temperature, pressure and humidity are displayed on the OLED screen. In order to access these data over the web server, you need to open a web browser on any computer, tablet, or smartphone connected to the same WiFi network and type in the ESP8266 IP address in the URL field and hit enter. On receiving a client request, the ESP8266 serves a webpage containing the BME sensor readings, as shown below.
BME280 local weather station
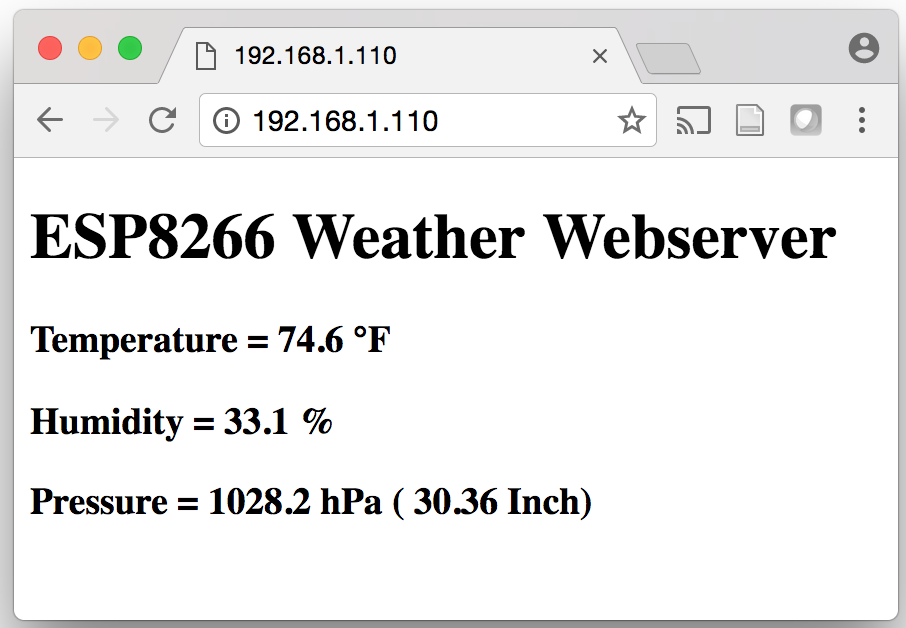
Weather data displayed on client’s browser
More tutorials