Making a mini LED Christmas tree

|
|
My two and a half year old son loves toys with flashing lights. For this Christmas I thought of making a mini LED Christmas tree for him. This project uses 22 multi-color LEDs which are driven by a PIC12F683 microcontroller using the Charlieplexing technique. The details of the build procedure is described in the following sections.

LED Christmas tree
Christmas tree control circuit
This section describes the electronics part of the project. It uses the PIC12F683 microcontroller that operates at 4.0MHz using the internal clock source and drives 20 LEDs through 5 I/O pins (GP0, GP1, GP2, GP4, and GP5) using the Charlieplexing technique. The 20 LEDs are connected to the five Charlieplexing signal lines (named A through E) as shown in the figures below. Multiple color LEDs are chosen to make the Christmas tree colorful and attractive.

Microcontroller circuit with five Charlieplexing lines

20 LEDs connected to the signal lines A through E
Construction of tree
First of all, make a paper layout of the tree and stick it on a cardboard or a foam board using glue. I am using the 0.2″ thick black foam board from Dollar Tree. Mark the places where you want to place LEDs on your Christmas tree. Next drill two holes (approximately 0.1″ apart) for LED legs at each marked LED position. Then cut the foam board along the layout of the tree. These steps are illustrated in the following pictures.
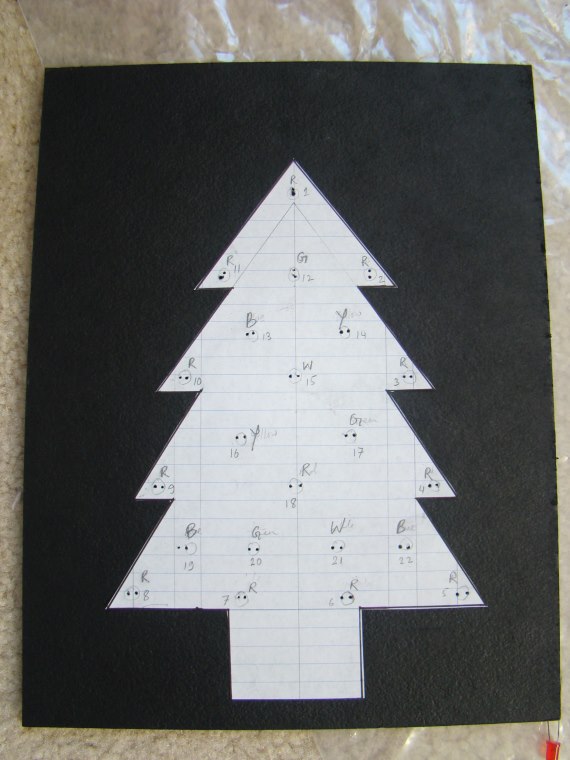
Layout of Christmas tree
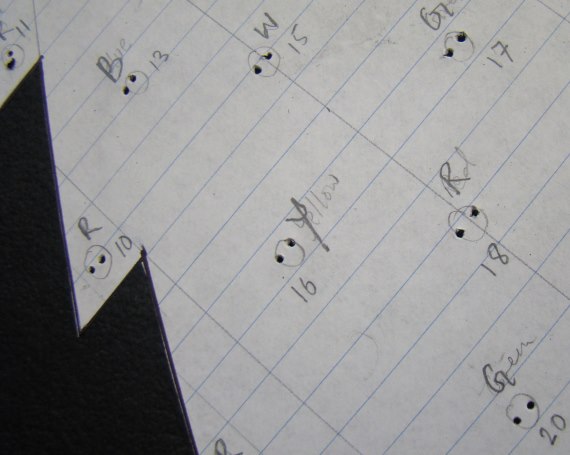
Drilling holes at LED positions
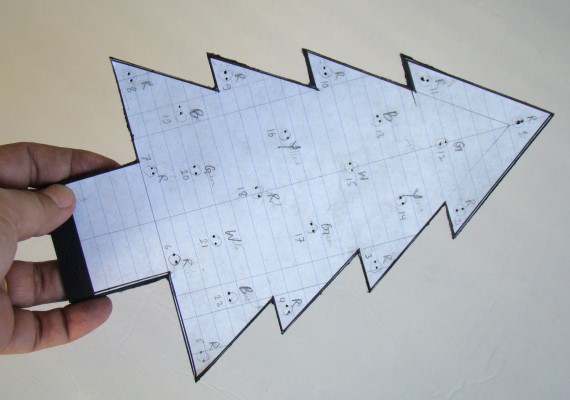
Christmas tree base ready
Next take a construction paper (I am using Green color) for the front view of the tree. You can glue the cut foam board tree to it first and then cut the paper along the edges of the foam board. Now you will have a more colorful front look for the tree, as shown below.
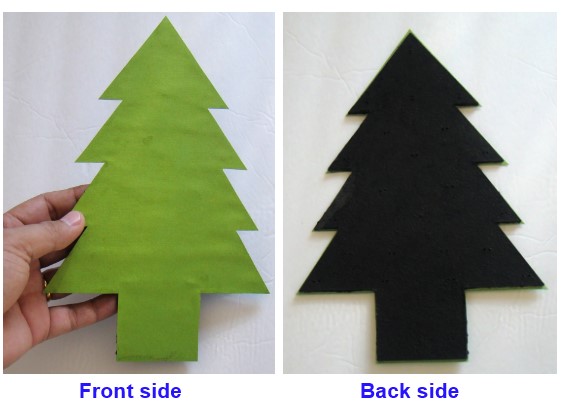
Finished tree base
The holes for LEDs are covered on the top with the newly added layer of the construction paper. You can extend these holes across the construction paper by inserting a sharp pin through each hole from back side to the front. Next insert LEDs from front side and bend their legs on back side for their support. The following picture shows the arrangement of LEDs in my Christmas tree. I put 11 5.0mm Red color LEDs (1-11) along the edges, and 11 more (multi-color) in the body area of the tree. This makes total 22 LEDs. The LEDs marked 1 through 20 are connected to the Charlieplexing circuit (discussed above) in the same way as described in the circuit diagram. LED 21 is connected in parallel with LED 16, and LED 22 is connected in parallel with LED 20. I added these two extra LEDs just for the symmetry of the LED distribution in the tree.

LED positions and numbers
Note that the LED labels (1-22) in the above picture are added later with Paint.net software for readers convenience and are not printed in the actual tree. You can also decorate your tree with various Christmas shape stickers as I did. All the LED wiring are done on back side of the tree. I fixed a small piece of general purpose prototyping board on back side that carries the five Charlieplexing signal lines along with 100 Ohm resistors in series. Each LED terminals should be connected to two Charlieplexing signal lines as shown in the circuit diagram before. This is the most time consuming part of this project. The second end of the five resistors are accessible through header pins on the prototyping board.

Wiring on back side

Back side circuit board with headers for Charlieplexing lines
For microcontroller part, I used the rapidPIC-08 board, which is designed for easy and rapid prototyping of standalone applications using PIC12F microcontrollers. You can buy rapidPIC-08 development board kit on Tindie. The complete setup is powered with a 9V battery. For standing support, I used alligator clips from my spare extra hands soldering aid tool to hold the Christmas tree in upright position.

Christmas tree and rapid PIC12F development board powered with a 9V battery
Software
I wrote the firmware for this project using mikroC Pro for PIC compiler from mikroElektronika. MikroC is one of the easiest, powerful, and rich library set C compilers I have known for PIC microcontrollers. It is a commercial compiler. However, the free version allows you to compile 2K size of hex file, which is good enough for developing small applications like this. Here I have shared the source code and HEX files of my firmware that generates four LED glow patterns in sequence and then repeats after some delay (watch the video at the end). There is a lot of programming space left for adding more patterns. It is currently using only 544 program words out of 2K.
The following picture shows the configuration word for the PIC12F683 MCU in this project.
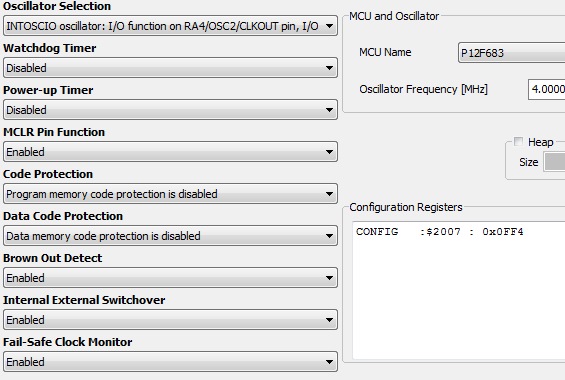
PIC12F683 configuration
Output
The mini LED Christmas tree is now shining in our living room. My son loves it.
LED Christmas tree with all LEDs on

My son (Rey) playing with his new Christmas toy
|
|
R-B
You are telling 20 nos. LED but there are 22 led in model and circuit also showing 20 nos. LED, how extra 2 lEDs will be connected in circuit.
Regards,
Akash
R-B
It is a really nice project, PIC12F683 not easily available, Can I replace it by 12F629
or 12675 , I saw data sheet PIN to PIN matching and there no analog signal requirement, only flash memory is 1024 words for 12F629 and 2048 words for
12F683.
one more thing , maximum how much delay we can make by ”
“Delay_us( );” can we produce 10 min dely by looping this command
Regards,
AkashNil
Pingback: Making a mini LED Christmas tree -Arduino for Projects
Hello,
really nice project, think’s for sharing.
I draw a christmas tree pcb based on your circuit
with eagle (but not tested) and like to share it
with you an the community,
Do you have an opportunity to receipt them ?
Merry Christmas,
Greetings from France
Fabrice
Hi Fabrice,
Yes, you can email me at admin (at) embedded-lab.com.
Hi Raj! It’s quite complicated..
But it is great! 🙂
thanks!
marC:)