Category Archives: EasyESP-1


Tutorial 5: Setting up an ESP8266 Web Server

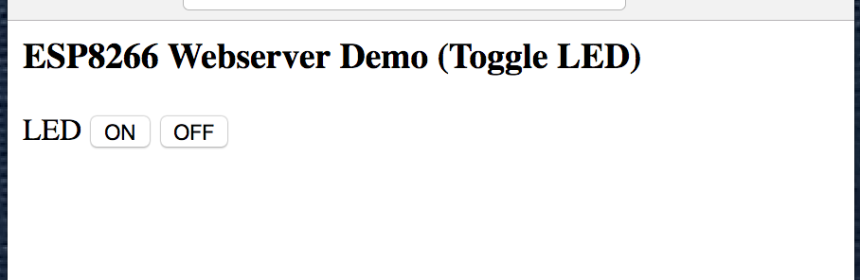
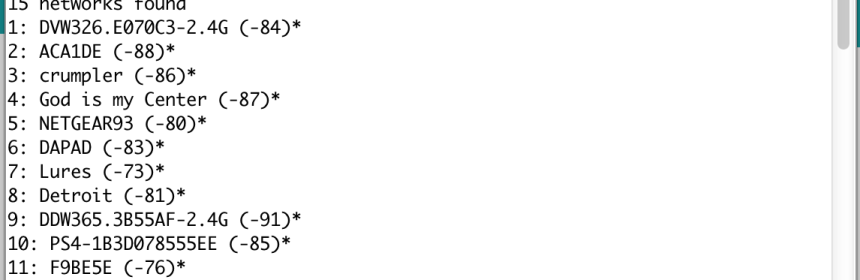
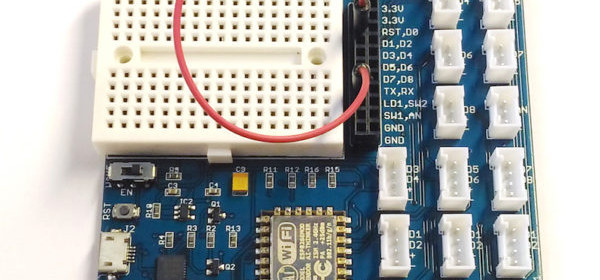
In this tutorial, we will explore how to setup an ESP8266 web server to serve an webpage that can be displayed on a client’s browser. The client can be any other computer, smartphone, or tablet connected to the same WiFi network. The webpage will also provide an user interface to allow you to toggle an I/O pin of the ESP8266 hardware. Hardware Setup There is nothing much to do in the hardware setup of this experiment. In your EasyESP-1 board, all you need to do is to connect the LD1 pin to D1 pin using a jumper cable. This will connect the

Read more

Tutorial 4: Working with ESP8266 WiFi Scan Class

Working with ESP8266 WiFi functionality using Arduino IDE has been made surprisingly simple by the availability of the versatile ESP8266WiFi library that allows user to configure the ESP8266 as a WiFi network scanner, a WiFi station (connected to a WiFi network), a soft access point (creating it’s own WiFi network), etc. In this tutorial, we will explore the features of the Scan Class of the ESP8266WiFi library. The Scan Class allows you to scan and list the available WiFi networks in the range. In order to try this feature, open an example code from File->Examples->ESP8266WiFi->WiFiScan. In the example code, int n = WiFi.scanNetworks(); returns the

Read more

Tutorial 3: Connecting an OLED display to ESP8266

Whether you want to show sensor readings, implement a navigational user interface menu, or display diagnostic information during prototyping a project, a graphic OLED display is always a cool add-on to embedded systems. In this tutorial, we will learn how to interface an I2C monochromatic OLED screen to ESP8266 (we will use EasyESP-1 board) using Arduino IDE. The OLED display used in this tutorial is SSD1306-based that can be bought for ~$5 on eBay or Aliexpress. You can also get a similar I2C OLED display with a grove connector from Elecrow for plug-and-play interfacing with the EasyESP-1 board. Buy EasyESP-1 board Hardware Setup

Read more

Tutorial 2: EasyESP-1 “Hello World” Example

After setting up the Arduino IDE to enable support for ESP8266, it’s time to write your first code for EasyESP-1 board. We will start with the classic hello world! example of electronics, a flashing LED. This is the best example to start with any new hardware platform as it gives us an opportunity to verify that the required software tools/drivers are installed properly and ready to rock. Hardware Setup In this example, we will connect the LD1 and D1 pins of J3 header together with a jumper wire as shown below. This will connect the LD1 LED near the bottom right corner of

Read more

Tutorial 1: Setting up the Arduino IDE for EasyESP-1

One of the simplest way to program the ESP8266 chip on board EasyESP-1 is using the Arduino IDE. Following steps describe how to enable the ESP8266 support in the Arduino environment. Step 1 : Install Arduino IDE The first step toward setting up the Arduino platform for programming EasyESP-1 is to download and install the Arduino IDE. Go to the Arduino website and download Arduino IDE 1.6.11. Step 2: Install ESP8266 core package Next step is to install the ESP8266 core for Arduino IDE. It is an add-on that allows to write sketches for ESP8266 using the Arduino IDE  and its libraries. The easiest way

Read more
« Older Entries Recent Entries »