Tutorial 1: Setting up the Arduino IDE for EasyESP-1

|
|
One of the simplest way to program the ESP8266 chip on board EasyESP-1 is using the Arduino IDE. Following steps describe how to enable the ESP8266 support in the Arduino environment.
Step 1 : Install Arduino IDE
The first step toward setting up the Arduino platform for programming EasyESP-1 is to download and install the Arduino IDE. Go to the Arduino website and download Arduino IDE 1.6.11.
Step 2: Install ESP8266 core package
Next step is to install the ESP8266 core for Arduino IDE. It is an add-on that allows to write sketches for ESP8266 using the Arduino IDE and its libraries. The easiest way to install the ESP8266 core is by typing in http://arduino.esp8266.com/stable/package_esp8266com_index.json
into Additional Board Manager URLs field in the Arduino-> Preferences window (see figure below).
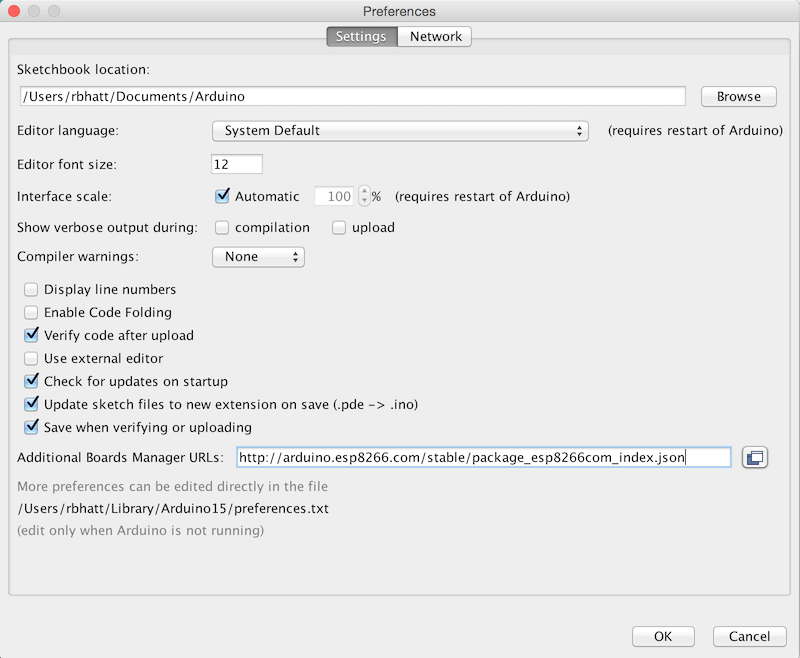
Adding ESP8266 support to Arduino IDE using Preferences window
Click OK and then go to Boards Manager and install the ESP8266 core. It appears at the end of the list as esp8266 by ESP8266 Community (see figure below). Select 2.3.0 version from the dropdown list.
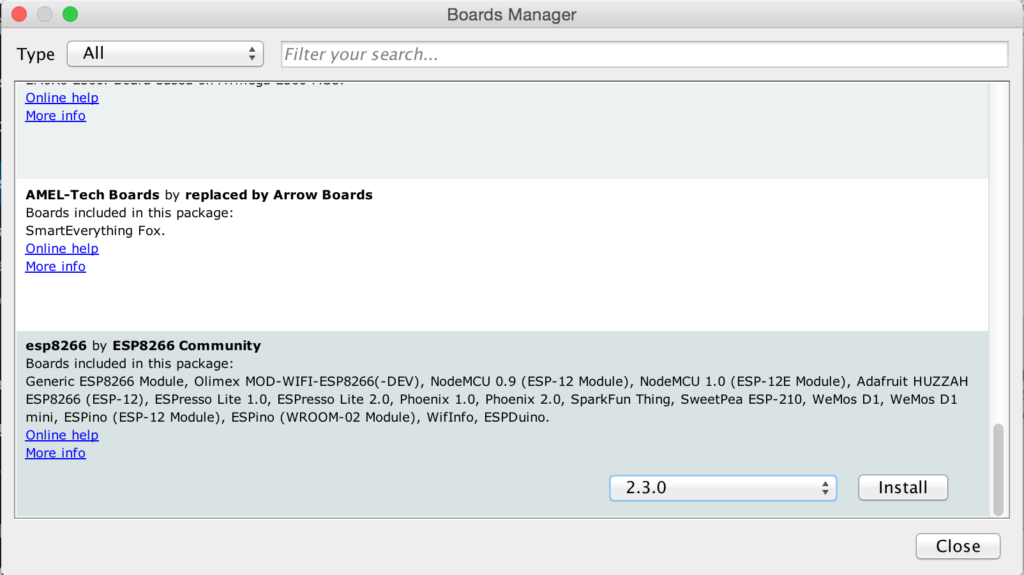
Installing ESP8266 core from Boards Manager
Step 3: Select the right board
Next you need to select NodeMCU 1.0 (ESP-12E Module) from Board menu.

Select NodeMCU 1.0 (ESP-12E Module)
Go to Tools and make sure the CPU Frequency is set to 80 MHz and Upload Speed to 115200. If not, change them to correct options.

CPU clock should be set to 80 MHz and Upload Speed to 115200
Step 4: COM Port selection
Finally, you need to select the right COM port that your EasyESP board is connected to. Obviously, you need to connect the EasyESP-1 to the computer through a USB cable. If the driver for SiLabs CP2102 USB-UART device is installed properly, it will show up in the Arduino IDE Tools->Port list as a new serial port. In Windows machines it shows up as a new COMx port. The following figure shows how it appears on a MAC computer. You should select the matching serial port for the CP2102 device on EasyESP from the Port list.
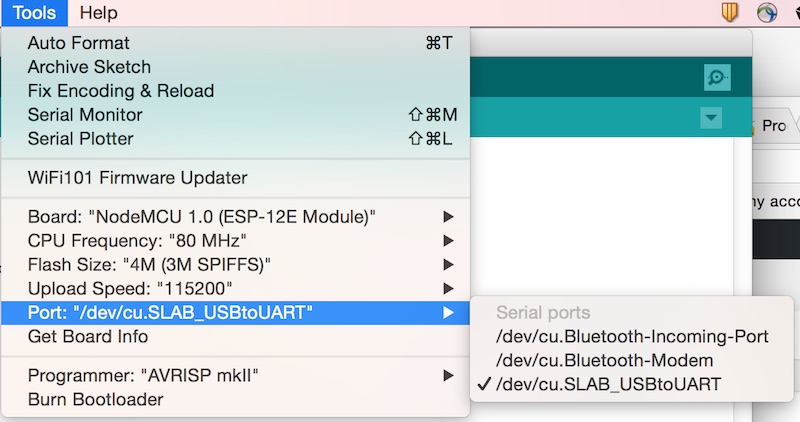
Select the right serial port (MAC computer)
Now you are all set to write and upload your first ESP8266 program using the Arduino IDE.
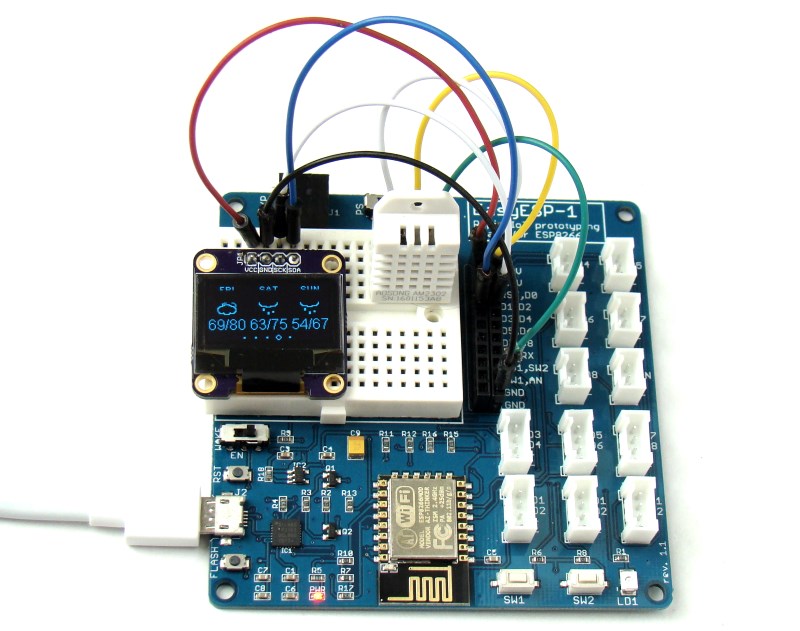
ESP8266 experimenting made easy with EasyESP-1
Buy EasyESP-1 board
|
|