chipKIT Project 1: Digital thermometer using an LM34 sensor

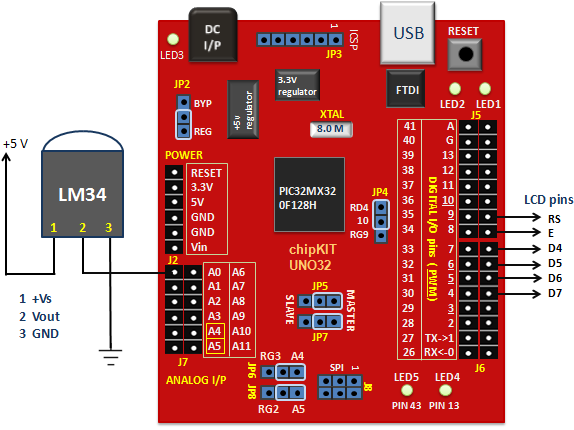
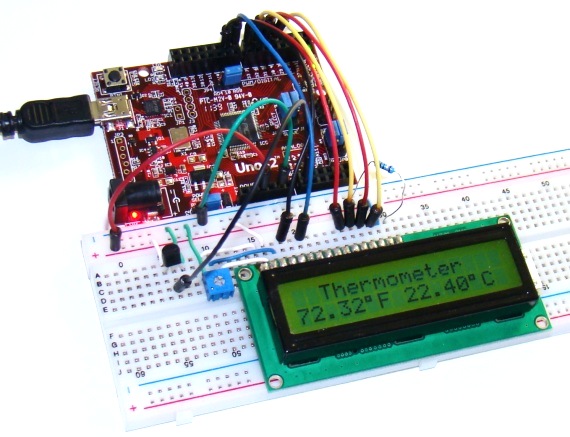
In Tutorial 3, we learnt how to use chiKIT ADC channels to read an external analog voltage and convert it into a digital number. We also discussed about interfacing a standard Hitachi 44780-based character LCD to the chipKIT Uno32 board in Tutorial 4. Now it’s time to implement the knowledge we have gained so far to make our first practical application using chipKIT, which is a digital thermometer. Since temperature is a non-electrical entity, the first thing we need is a transducer or sensor to convert it into an electrical signal. In this project, we will use the LM34 sensor to do that, which converts the surrounding temperature into an analog electrical voltage. The sensor’s analog output is fed to an ADC channel of the chipKIT Uno32, which then process the signal and displays the temperature on LCD, in both degree Celsius and Fahrenheit scales.


