chipKIT Project 5: Digital stopwatch on seven segment LED display
|
|
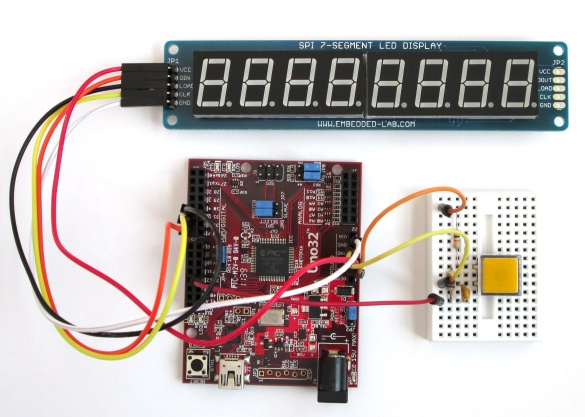
In this project, we will use the chipKIT Uno32 board to build a digital stopwatch capable of timing minutes, seconds, and 1/10th of seconds, and with a basic start and stop control feature. A MAX7219-driven 8-digit seven segment LED display is used to display the time elapsed. The Reset switch on the Uno32 board will be used to reset the current time back to 0 when the stopwatch is stopped.
chipKIT digital stopwatch project illustration
Theory
A stopwatch is a timepiece that measures the amount of time elapsed between the time when it is started and the time it is stopped. Stopwatch is useful in many activities, including sports, games, and cooking, for timing events. We are going to construct a digital stopwatch using the chipKIT Uno32 board and the SPI7SEGDISP8.56-1R display module. The stopwatch will have the time resolution of 1/10th of a second or 100 milliseconds, and maximum measurable interval of 99 minutes, after which the stopwatch rolls over to zero again. More details on the MAX7219-based serial seven segment display interface can be found here.
| SPI7SEGDISP8.56-1R is a MAX7219-based 8-digit seven segment LED display and requires only 3 I/O pins of the MCU to control all the digit segments. It also supports brightness control through software command. | 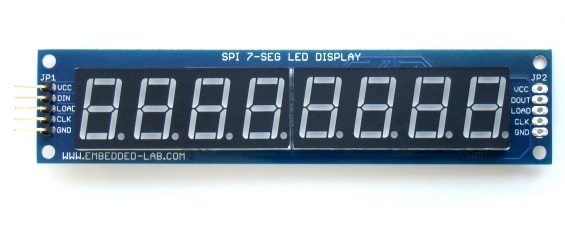 |
| Buy SPI7SEGDISP8.56-1R from our Tindie Store | |
Circuit setup
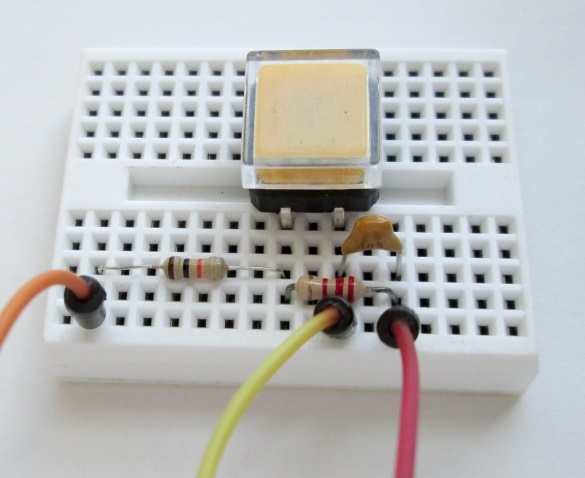
The power supply pins (VCC and Gnd) of the SPI7SEGDISP8.56-1R module are connected to the 5V and Gnd header pins of the Uno32 board. The DIN, CLK, and LOAD signal lines are driven by digital output pins 7, 6, and 5 of the Uno32 board. A tact switch is also required to toggle between Start/Stop of the stopwatch. It is connected to the interrupt pin INT0 (which is available on I/O pin 38) of the Uno32 board. A simple RC filter circuit is used to debounce the switch. The following figure shows the switch debouncer circuit and its debounce time as implemented in this project. The debounce time can be computed from the simple RC circuit transient response equation as illustrated below. For the given values of R2 and C1, the debounce time is computed to be ~3.5ms.
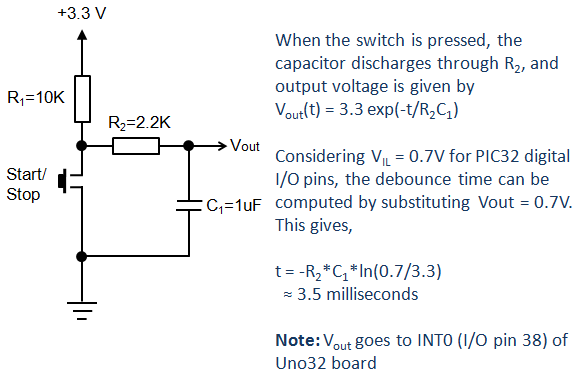
Stopwatch Start/Stop switch with a hardware deboucing circuit
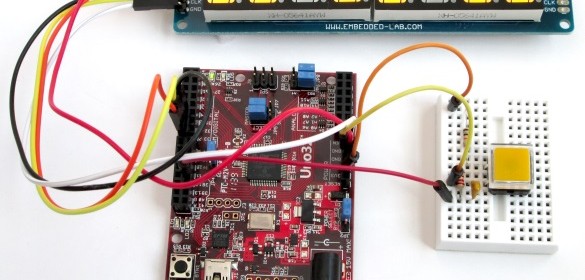
The complete setup of this project is shown in the picture below. The Start/Stop switch and the debounce circuit is built on a breadboard.
Complete setup of the project
Start/Stop switch with debouncing circuit is arranged on a breadboard
chipKIT sketch
This project uses the millis() function for time keeping. The millis() is a built-in function in Arduino, and so in MPIDE, that returns the number of milliseconds elapsed since the current sketch started. This value overflows after approximately 50 days. The time resolution of this stopwatch project is 1/10th of second, or 100 ms. So, a counter is set to increment every 100 ms, and it overflows and rolls back to 0 in 10 counts, which is equivalent to 1 sec. Variables are defined to store minute, second, and tenth of second information. The elapsed time is displayed in MM-SS-TS (TS is tenth of sec) format on the seven segment display. The LedControl library is used in this project to interface the MAX7219-based seven segment LED display with the chipKIT Uno32 board. The stopwatch is started and stopped by pressing the push switch attached to INT0 (pin 38) pin. The INT0 trigger mode is defined as FALLING, which means the interrupt routine is called when the INT0 pin goes from high to low. The complete sketch of this project can be downloaded from the link below. Upload this sketch to your chipKIT Uno32 board and the stopwatch is ready to roll.
Download the LedControl library from here.
Output
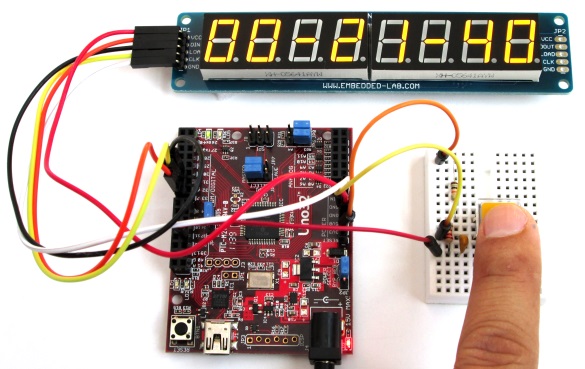
The operation of the stopwatch is pretty simple as described earlier. The stopwatch displays all zeros when powered on. Pressing the tact switch starts the stopwatch. On second press, the stopwatch stops. It can be reset to zero by pressing the Reset button on the Uno32 board.
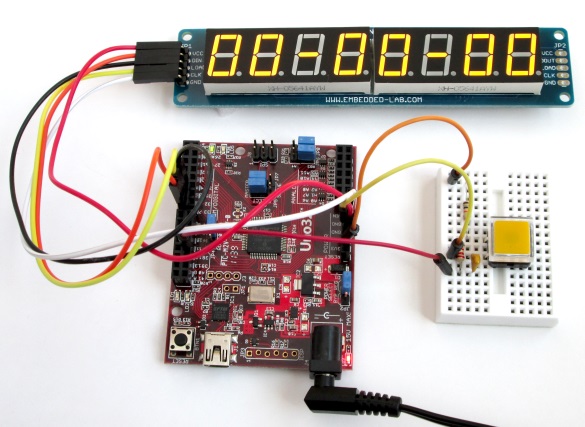
Stopwatch starts with all zeros on seven segment LED display
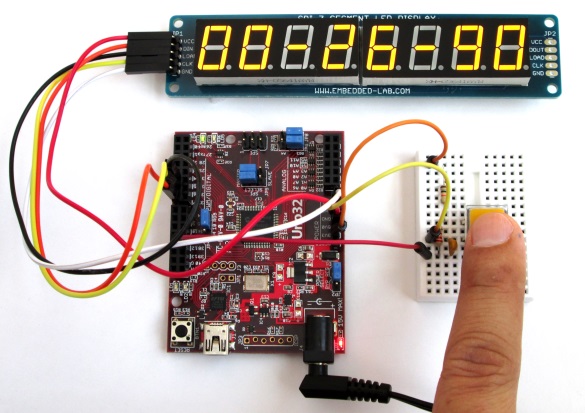
Pressing the switch to start and stop the stopwatch
Watch this video of stopwatch in action.
|
|
Pingback: chipKIT Project 5: Digital stopwatch on seven segment LED display -Use Arduino for Projects
Hallo,
Projekt ist SUPER.
geht das auch mit einen OLED_0,96″_I2C ?
Ede
Hi
Would you please be kind enough to share the proper schematic of the connections.
I am considering to use Arduino Nano for this project.
Thanks and regards.
Hello , I am interested in purchasing this kit for the stopwatch, can you advise me of the cost to ship to England. Also, can I upload the code to drive the display using my Arduino software and the UNO v3 board. Do i have to buy a Uno32 board.
Rahj, we have worked together in 2013, do you remember , ? How is your wife and little boy ( not so little now, i bet .
Hope to hear from you soon
Victor
Victor,
Yes, you can use it with any Arduino board, you don’t need to buy Uno32.
Also, I have sent you an email with more details.
Pingback: chipKIT Digital Stopwatch » chipKIT Development Platform