Mastering the SiLabs C8051 Microcontroller
|
|
Hardware
The major hardware items I used for this work are as follows:
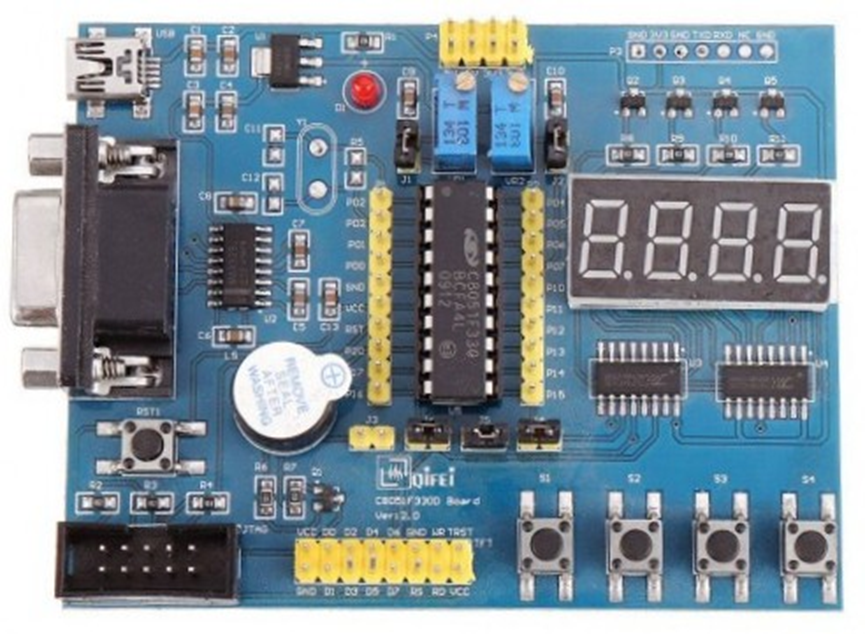
- SiLabs C8051F330D Microcontroller Development Board. This board features a 74HC595 seven-segment display, four input buttons, a programmer-debugger interface, GPIO pin headers, a buzzer, UART to RS232 converter and power pins.
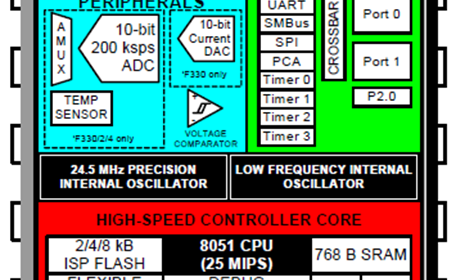
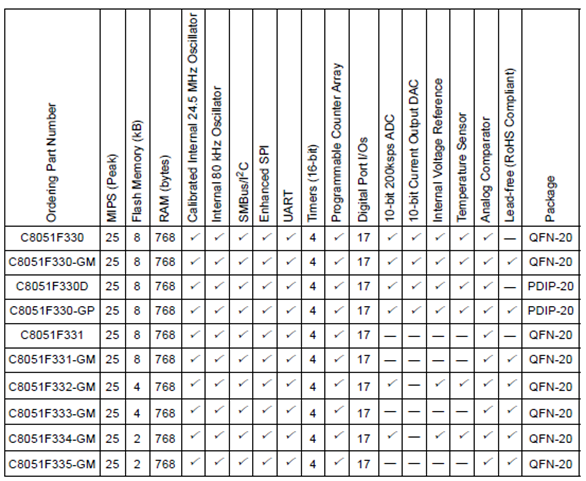
The table below summarizes the feature of C8051F33x microcontrollers. Note only C8051F330 comes in PDIP package and this makes it breadboard-friendly.
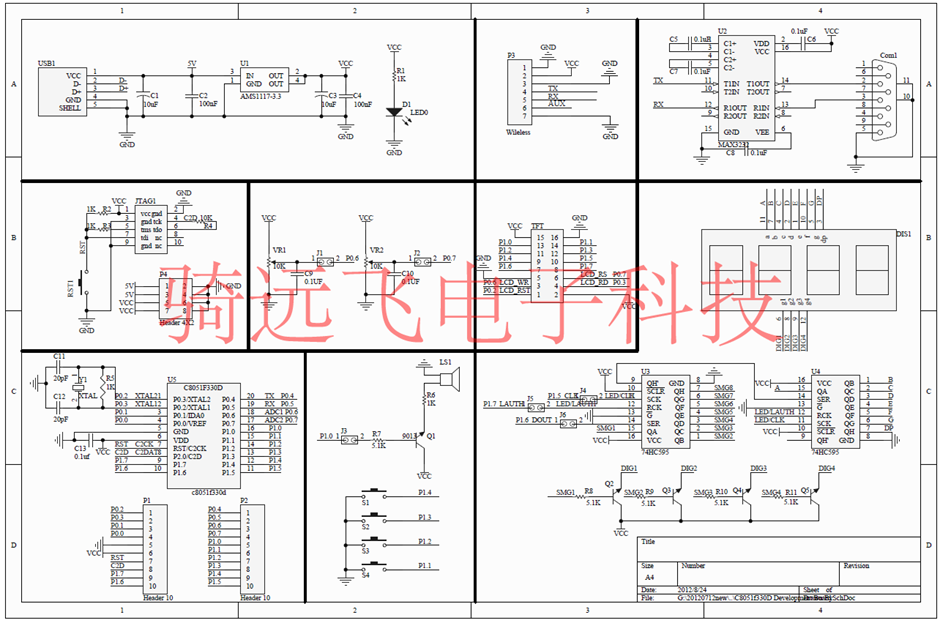
The board has the schematic as shown below.
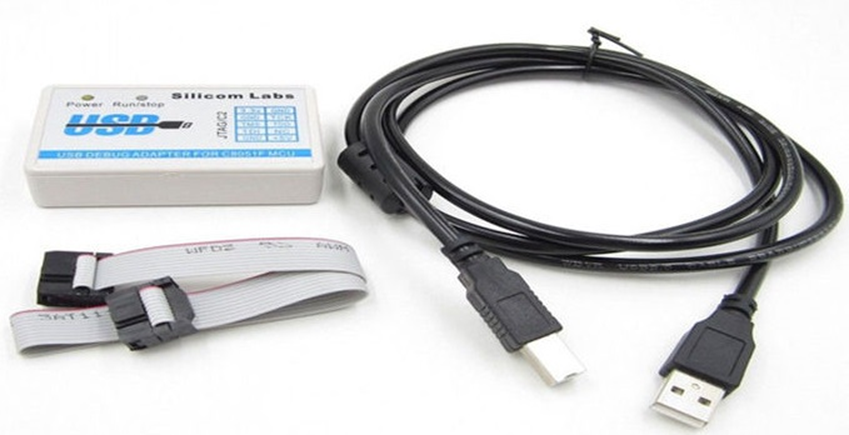
- Silicon Labs USB-programmer-debugger. This will be needed to download codes into C8051 microcontrollers.
- Apart from these I have used various breakout boards and sensors. All of the items I used are common and inexpensive.

- I also recommend downloading the latest datasheet, app notes and other tools of the C8051F330D microcontroller from the SiLabs’ official website.
|
|
Thanks for the feedback….